

You need a live Paytm for Business account with production API keys already issued. Test keys will not work on a live store.
Getting the Merchant ID and Merchant Key
1
Open Production API Details in the Paytm dashboard
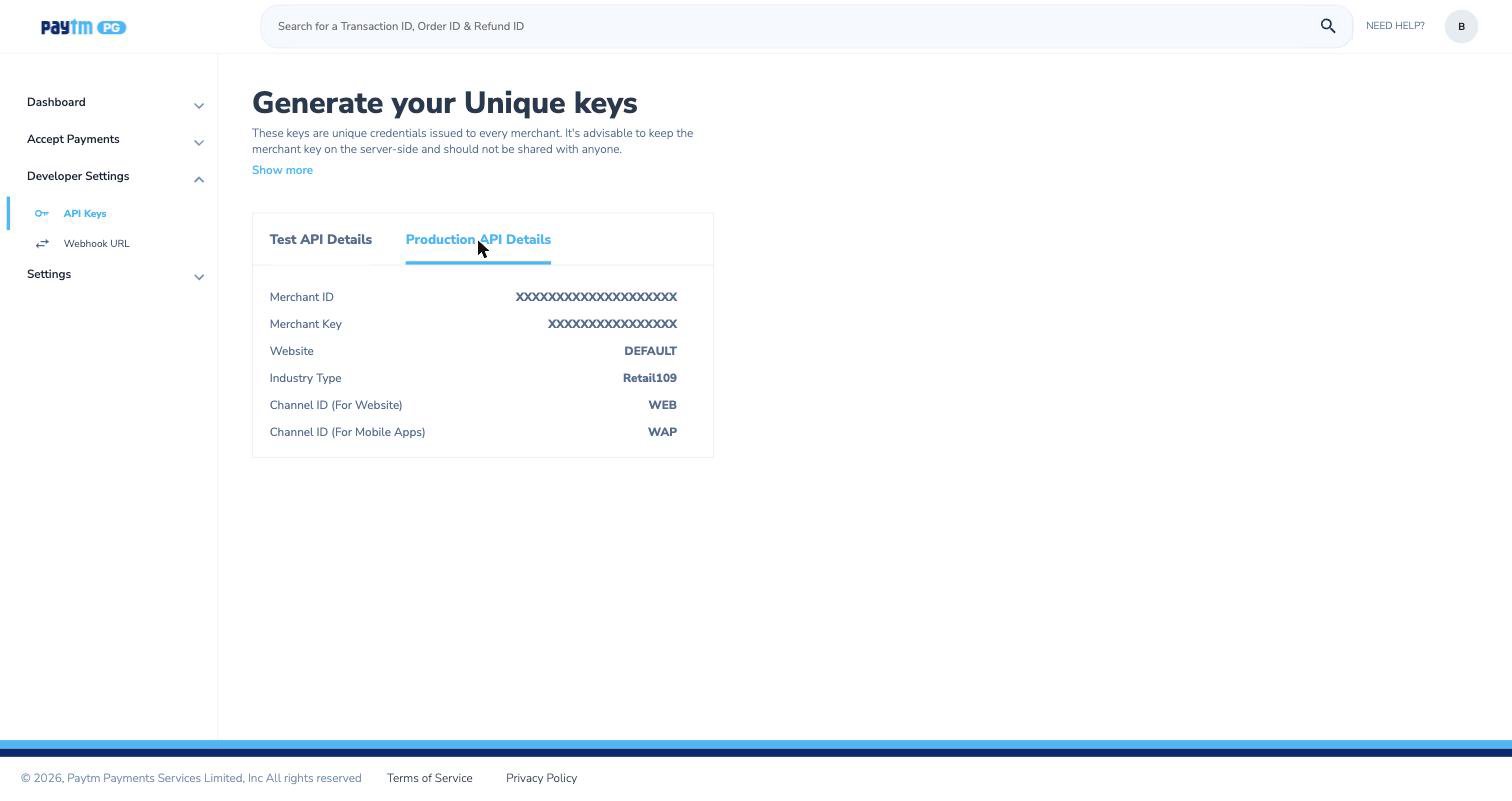
- Log in to the Paytm dashboard.
- Go to Developer Settings → API Keys.
- Select the Production API Details tab.
2
Copy the credentials
From the Production API Details table, copy and keep handy:
Set up the Paytm webhook
Webhook setup is a mandatory step as it confirms the order creation on your store.
1
Open the Webhook URL page
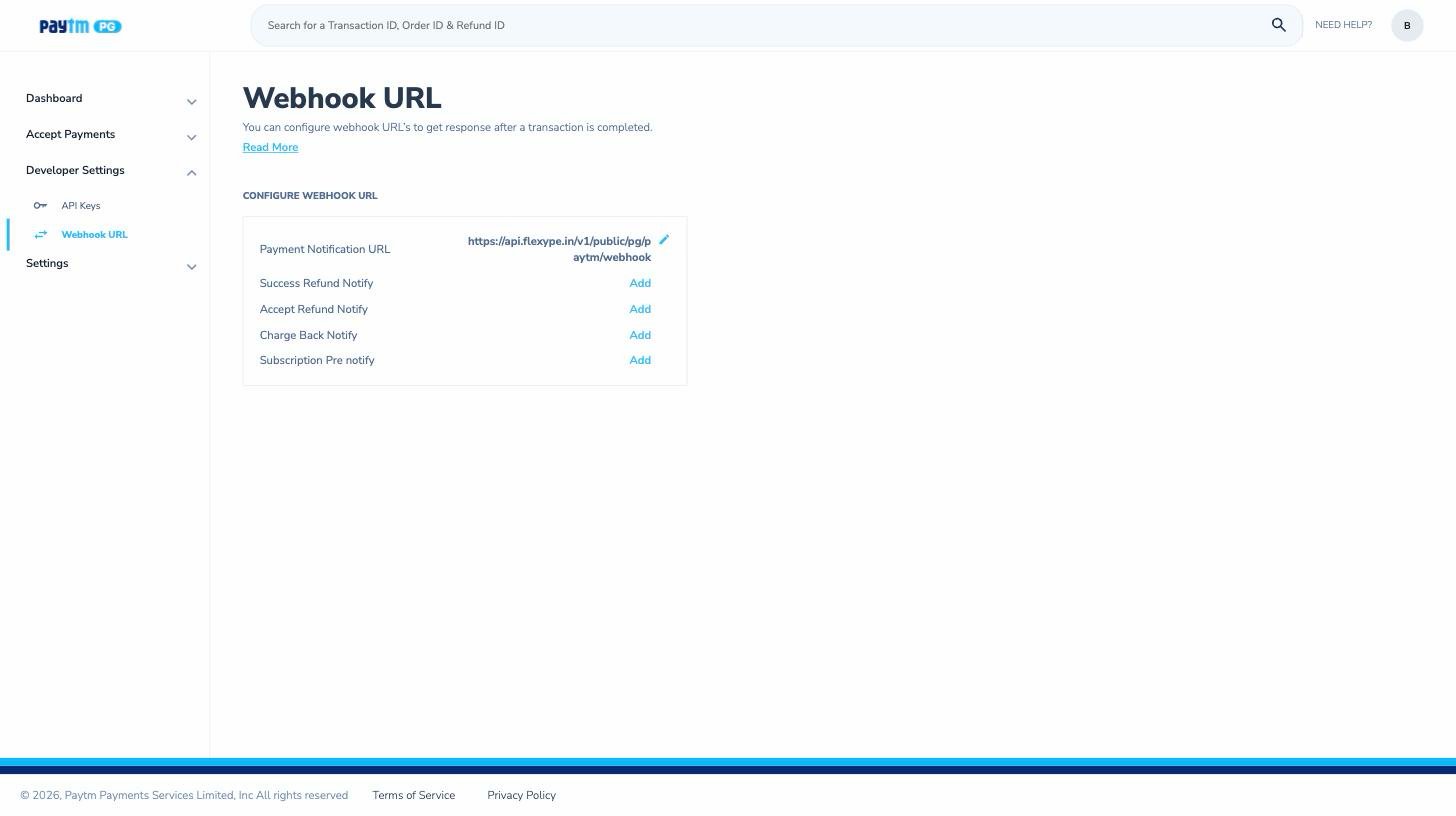
- In the Paytm dashboard, go to Developer Settings → Webhook URL.
2
Set the Payment Notification URL
- Click the edit (pencil) icon next to Payment Notification URL.
- Paste the following URL:
- Save the change.
Integrate Paytm with FlexyPe
1
Open Payments in the FlexyPe dashboard
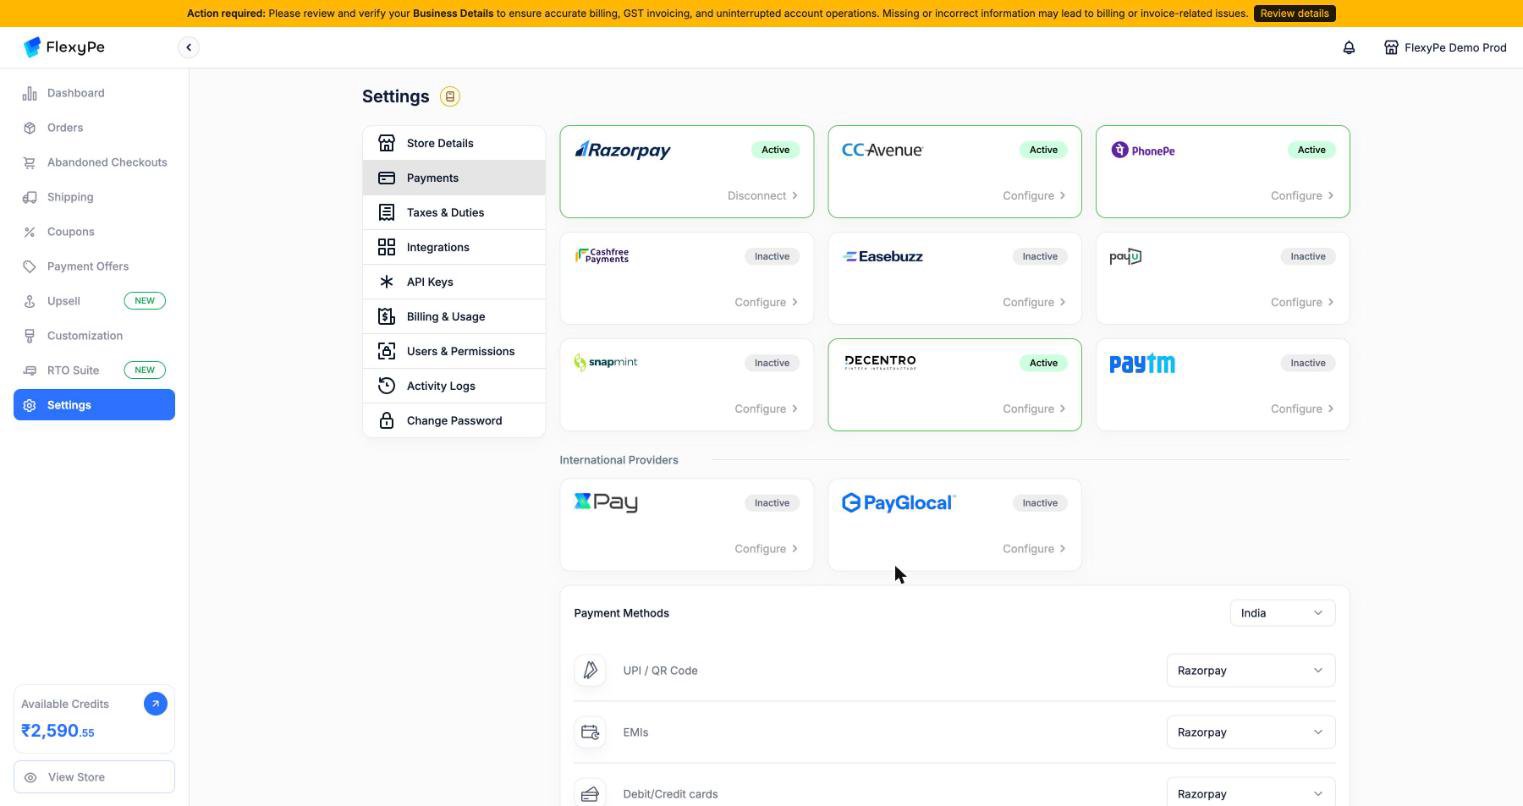
- Log in to your FlexyPe Dashboard.
- Go to Settings → Payments.
- Find the Paytm card and click Configure.
2
Enter your Paytm credentials
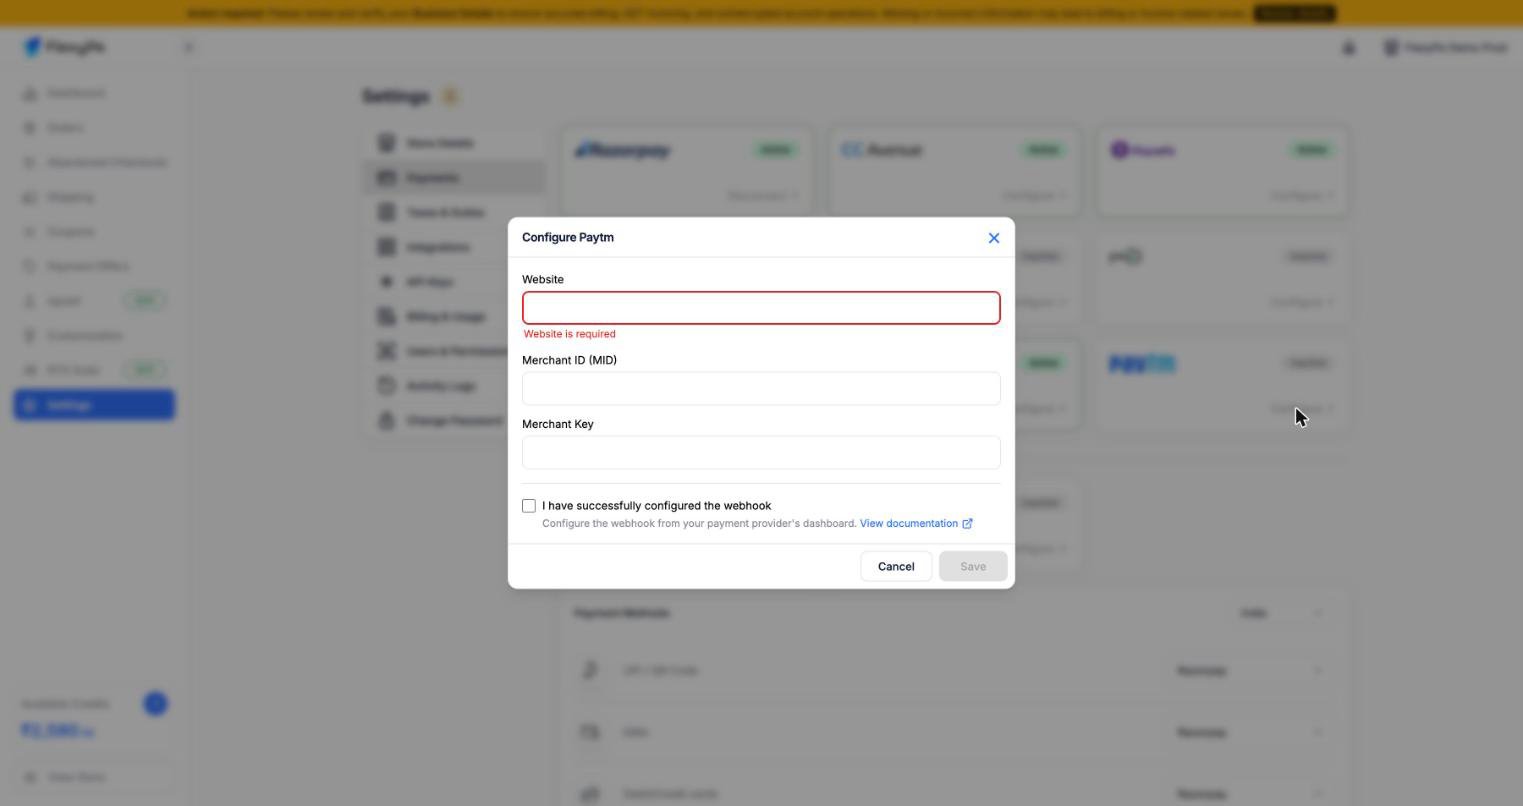
- Website — the Website value from Paytm’s Production API Details, usually
DEFAULT. - Merchant ID (MID) — paste the Merchant ID you copied.
- Merchant Key — paste the Merchant Key you copied.
- Tick I have successfully configured the webhook once the Payment Notification URL is saved in Paytm.
- Click Save.
3
Route payment methods through Paytm
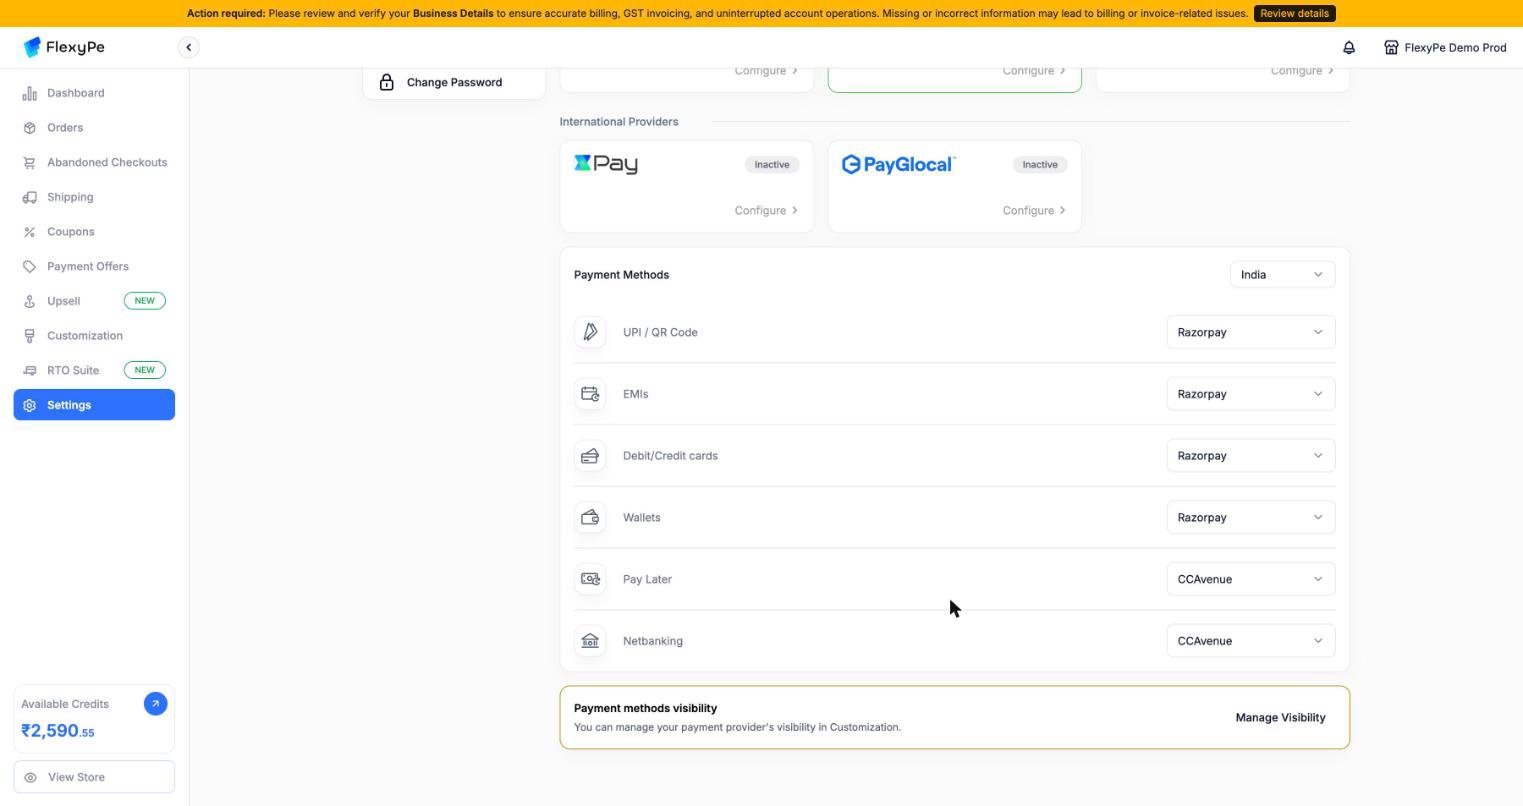
- Scroll to the Payment Methods section below the provider cards.
- For each method you want Paytm to handle — UPI / QR Code, EMIs, Debit/Credit cards, Wallets, Pay Later, Netbanking — change the provider dropdown to Paytm.
4
Complete payment setup
- With credentials saved in FlexyPe and the webhook configured in Paytm, setup is complete.
- The Paytm card status changes from Inactive to Active, and FlexyPe is ready to process payments.
Troubleshooting
Orders are not created after a successful payment
Orders are not created after a successful payment
The Payment Notification URL is missing or wrong in Paytm. Confirm it is set to
https://api.flexype.in/v1/public/pg/paytm/webhook under Developer Settings → Webhook URL.Transactions fail immediately after configuring
Transactions fail immediately after configuring
You may have used Test API Details instead of Production API Details. Re-copy the Merchant ID and Merchant Key from the Production tab.
Save is disabled in the Configure Paytm dialog
Save is disabled in the Configure Paytm dialog
All three fields — Website, Merchant ID, and Merchant Key — are required. Website is usually
DEFAULT.