Getting the API keys and Pixel ID
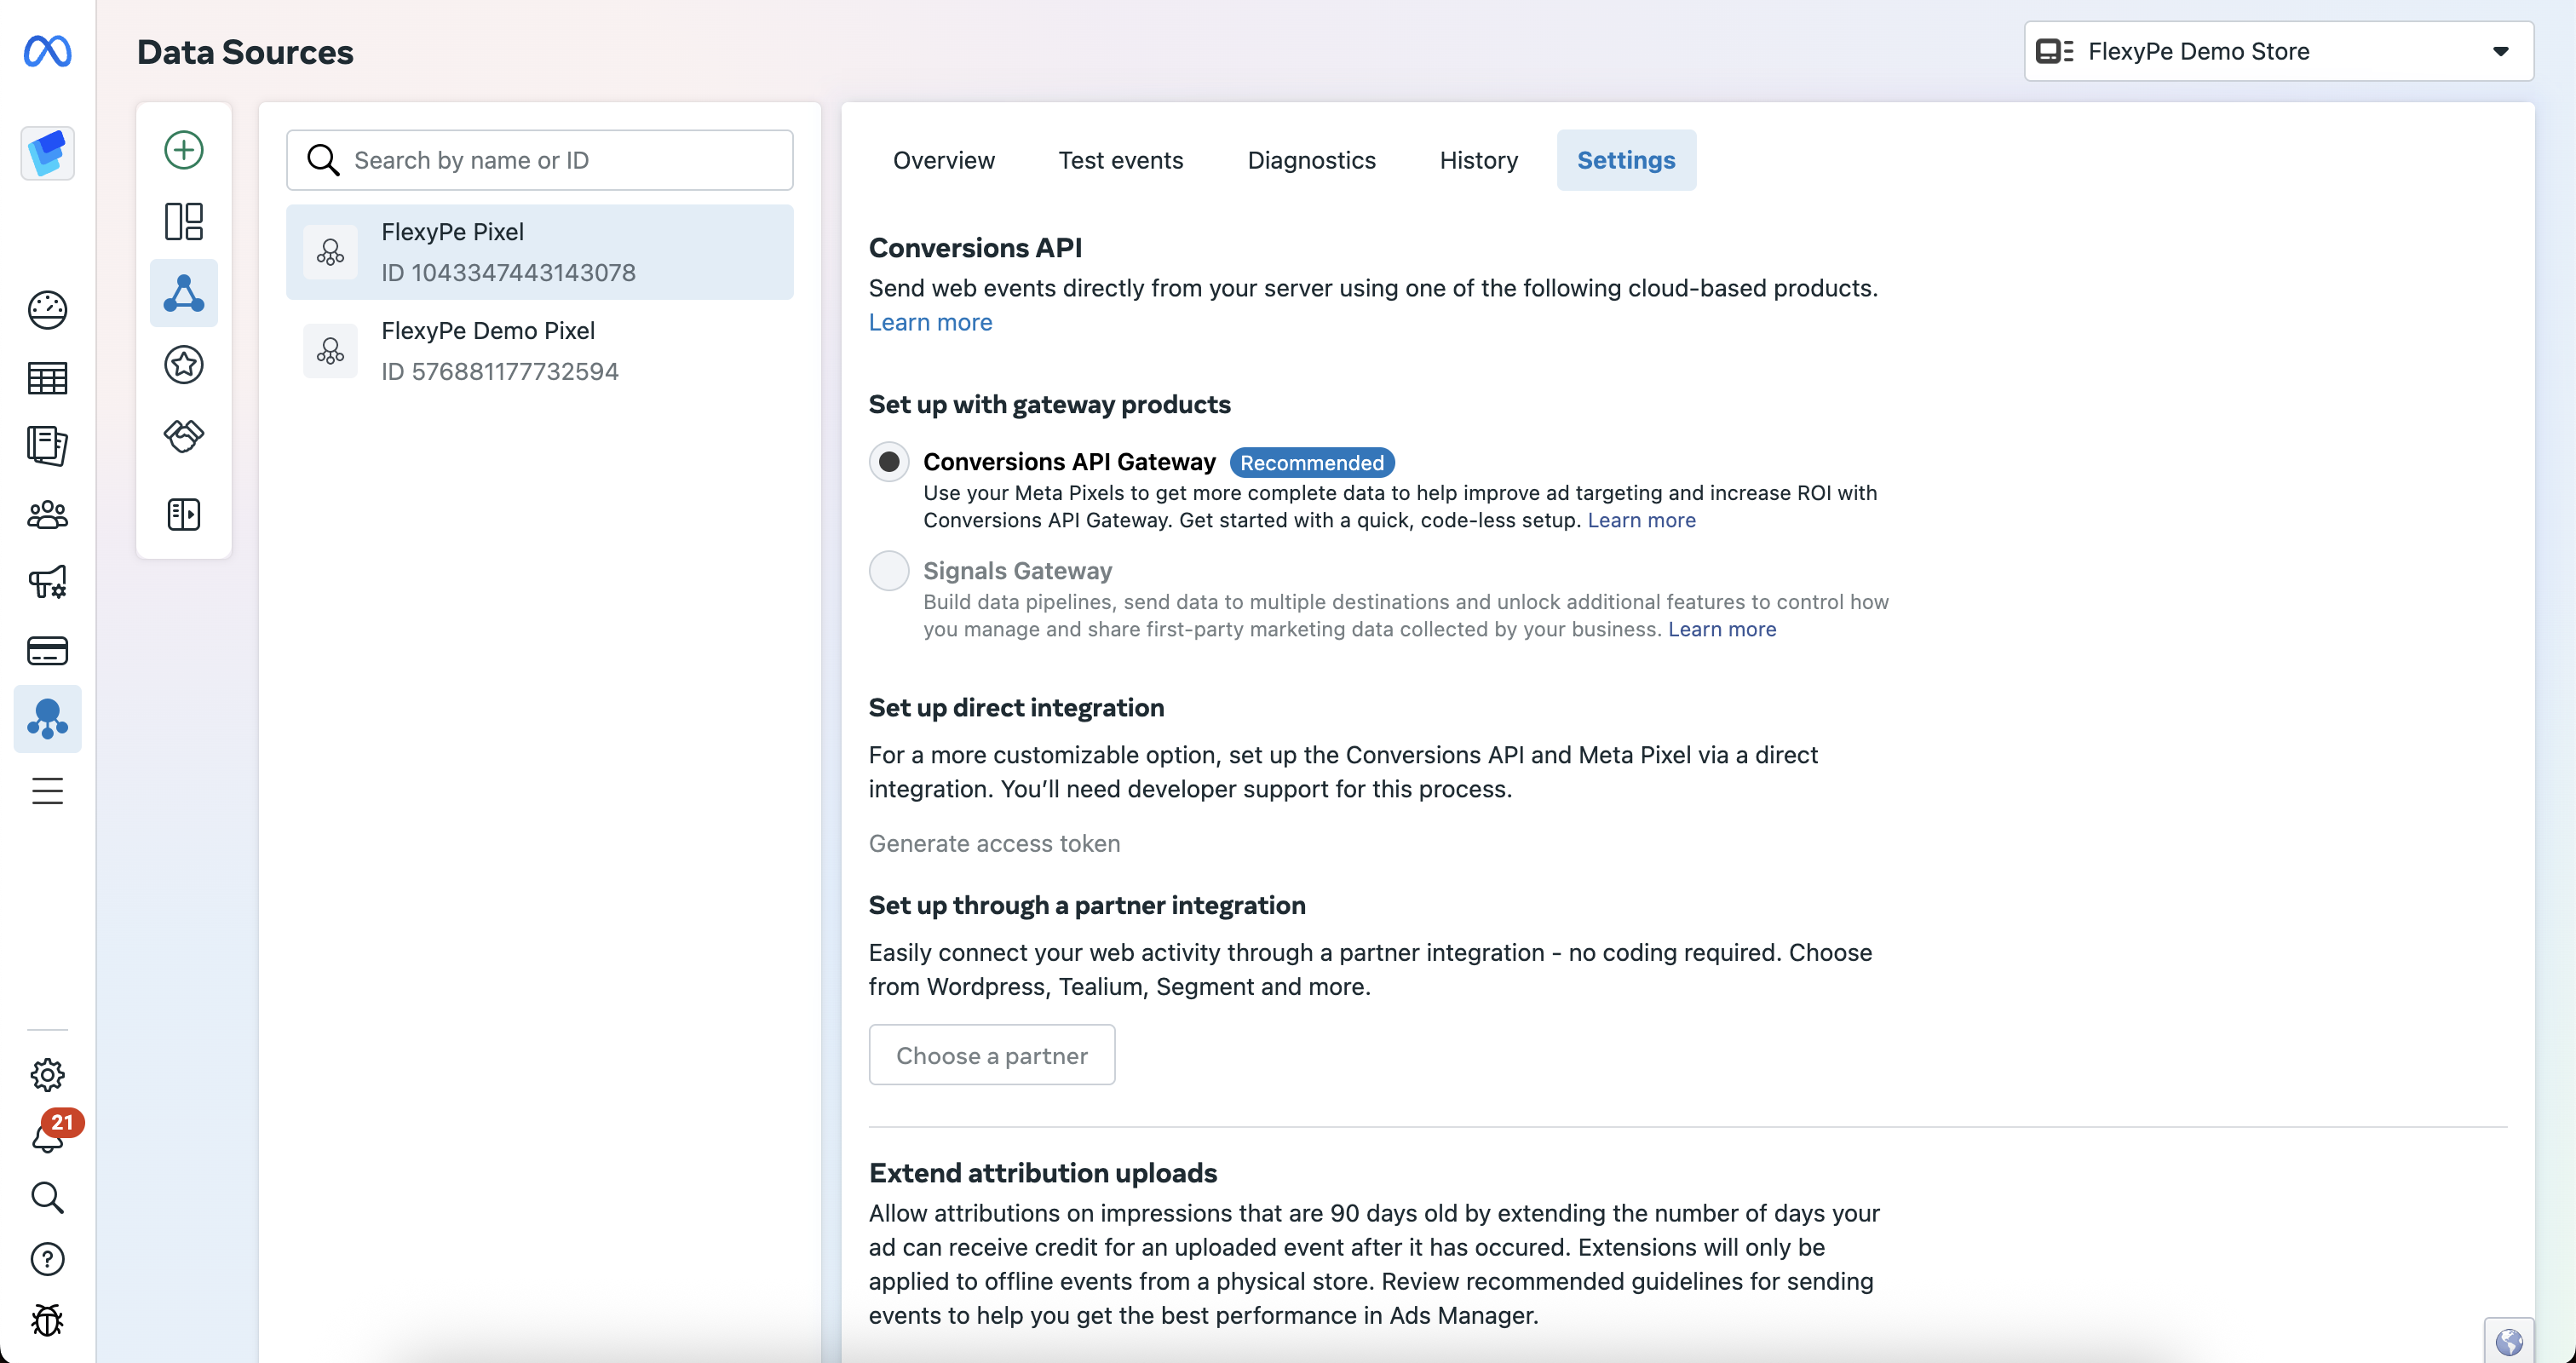
Accessing your Meta Business Suite.
- Log in to your Meta Business Suite.
- Click on the All Tools menu and select Events Manager.
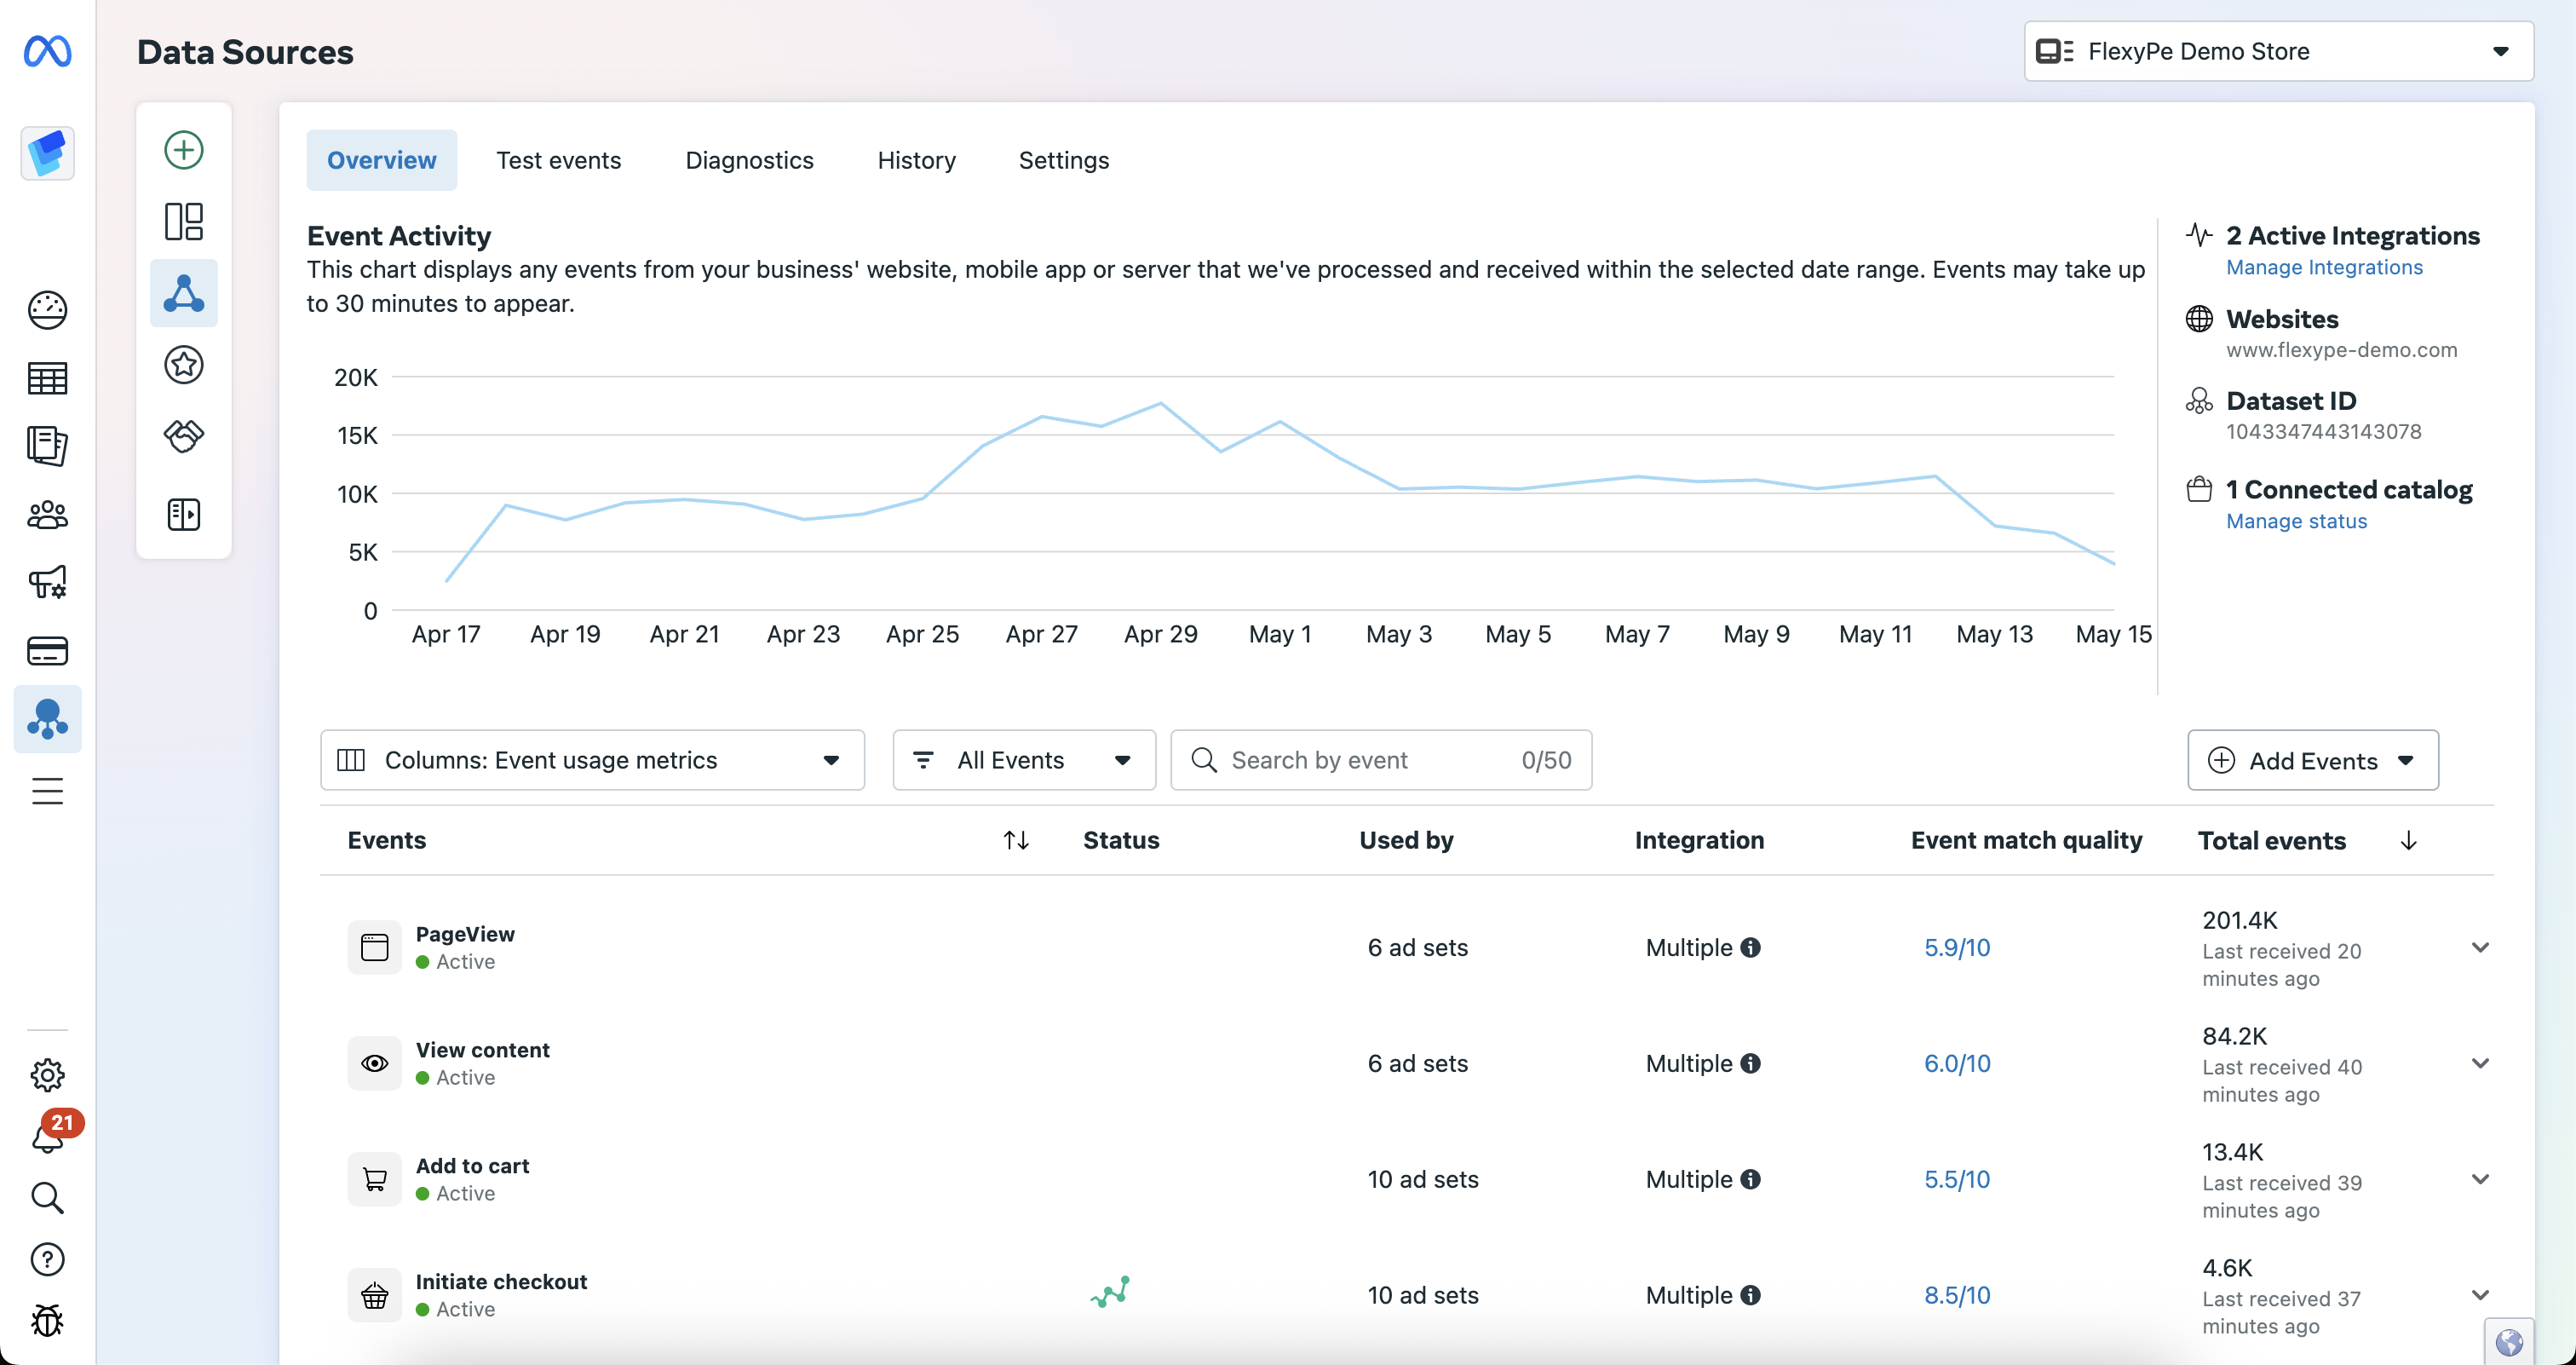
- Navigate to Data Sources.
Select your Shopify Pixel
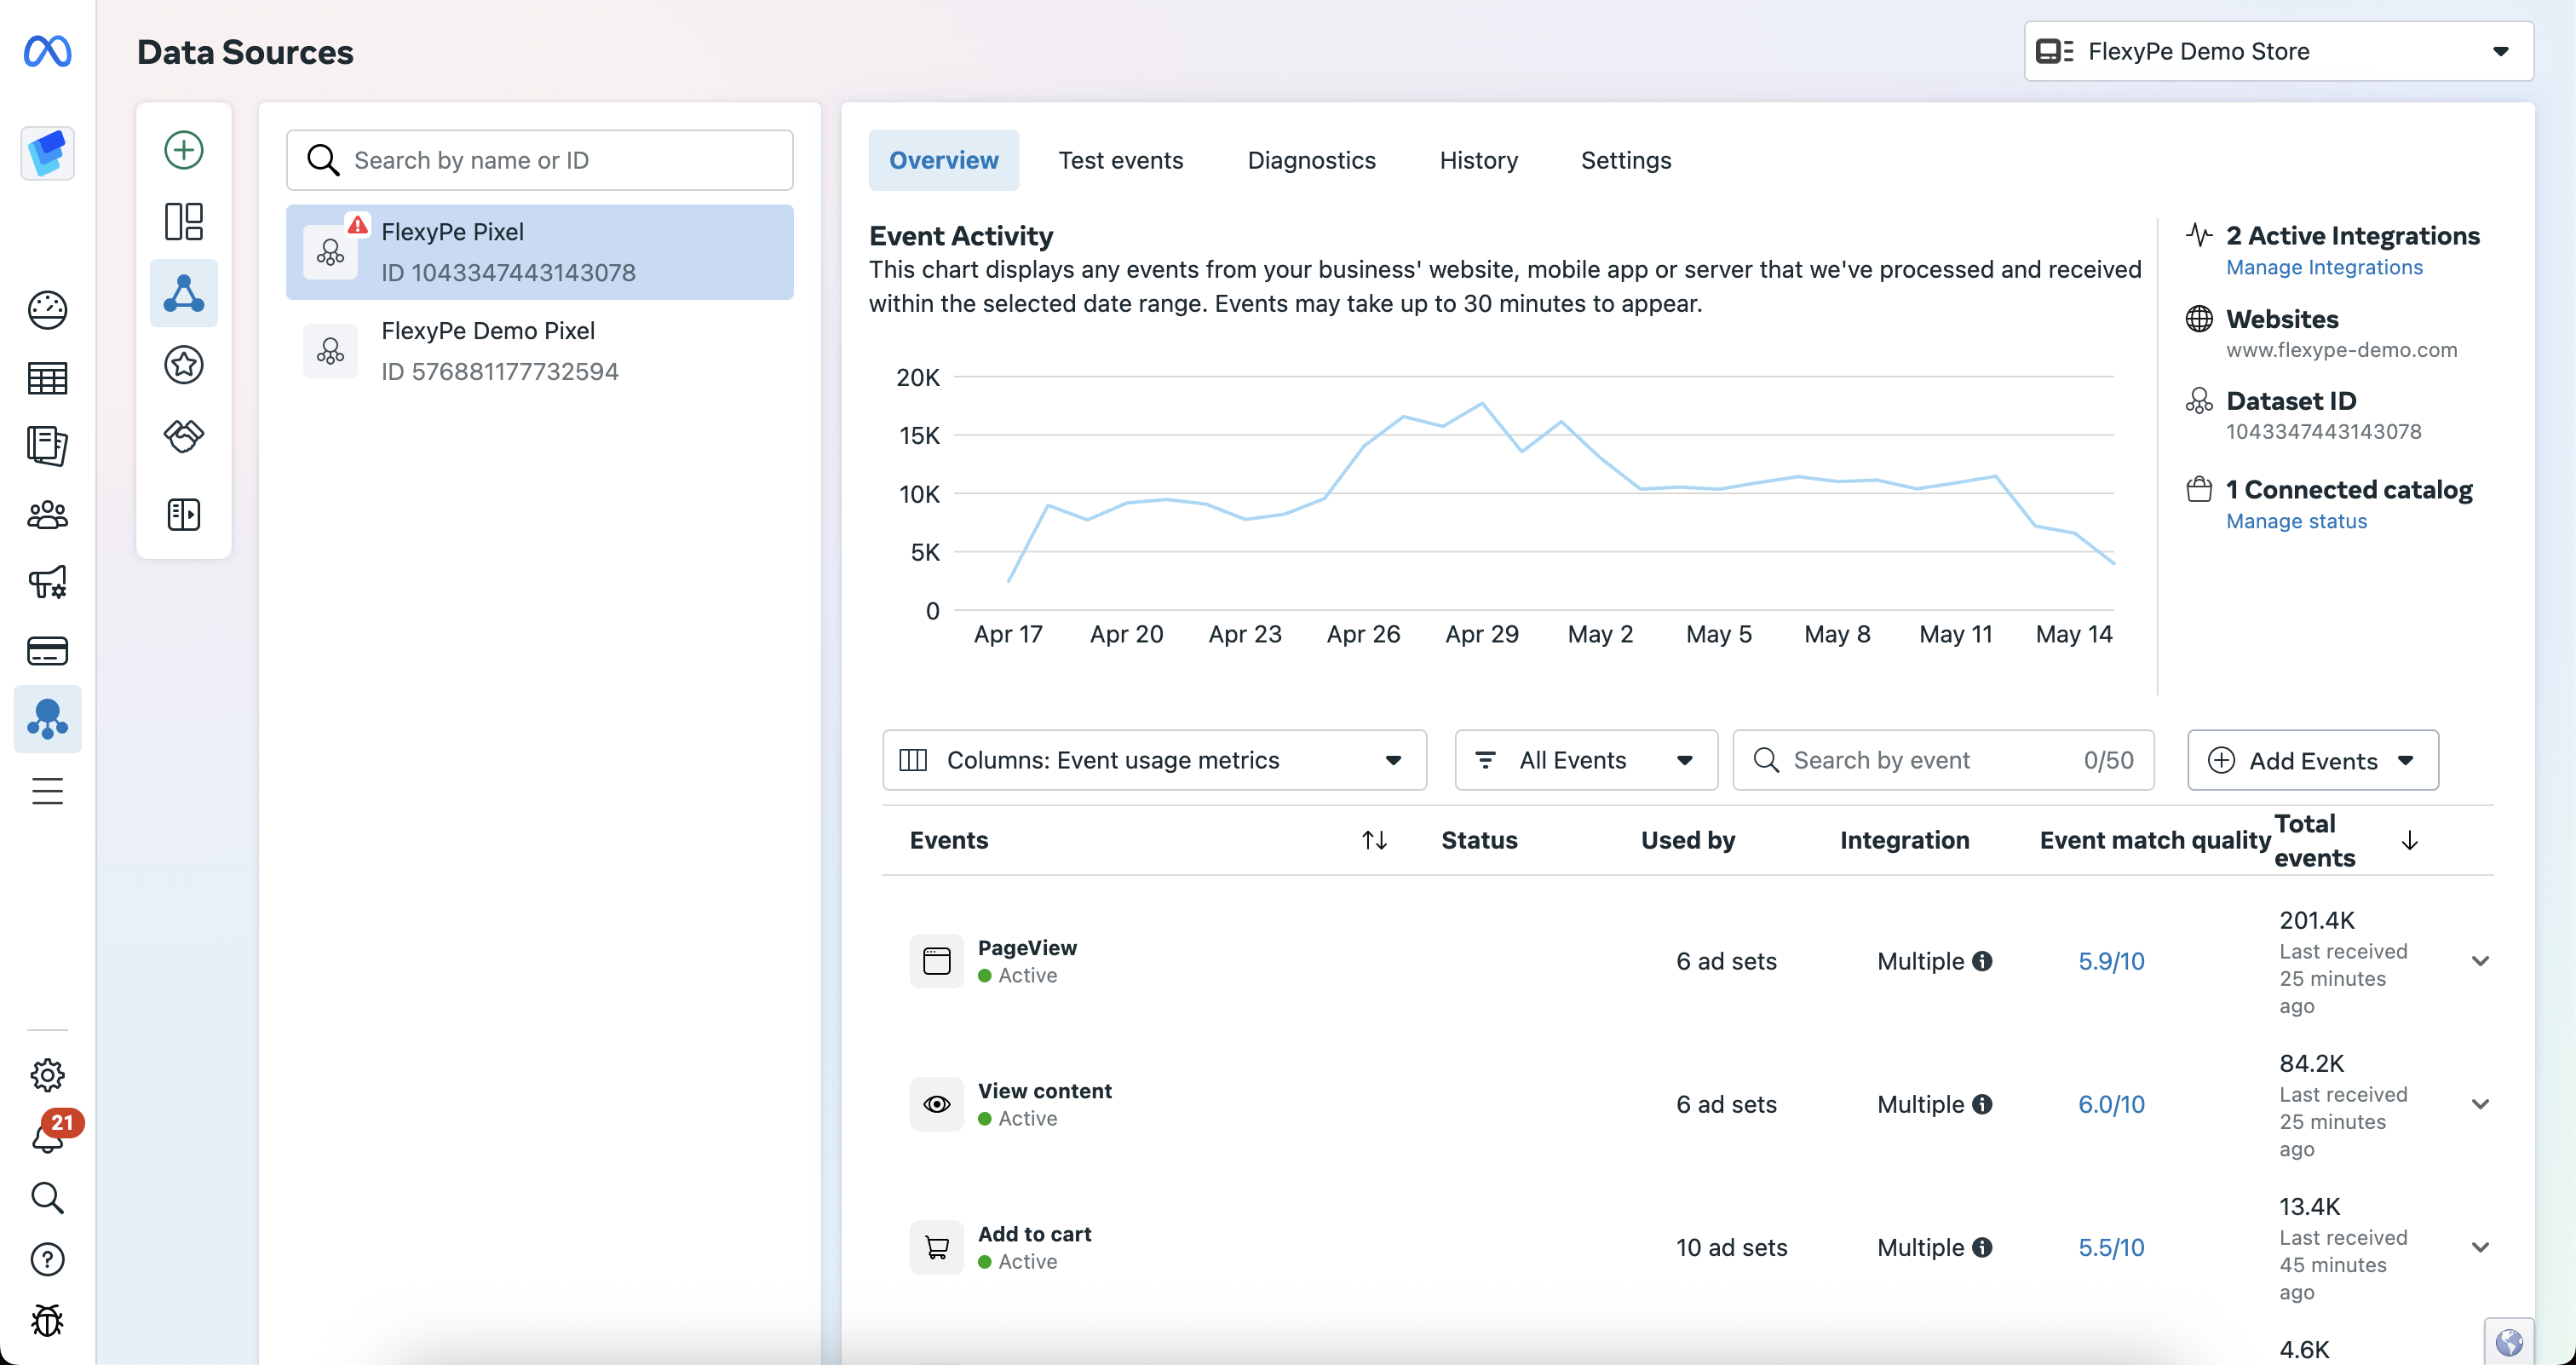
- From the list of available pixels, locate the one linked to your Shopify store.
- Select the pixel to connect it with your conversion tracking.
Getting the Pixel ID
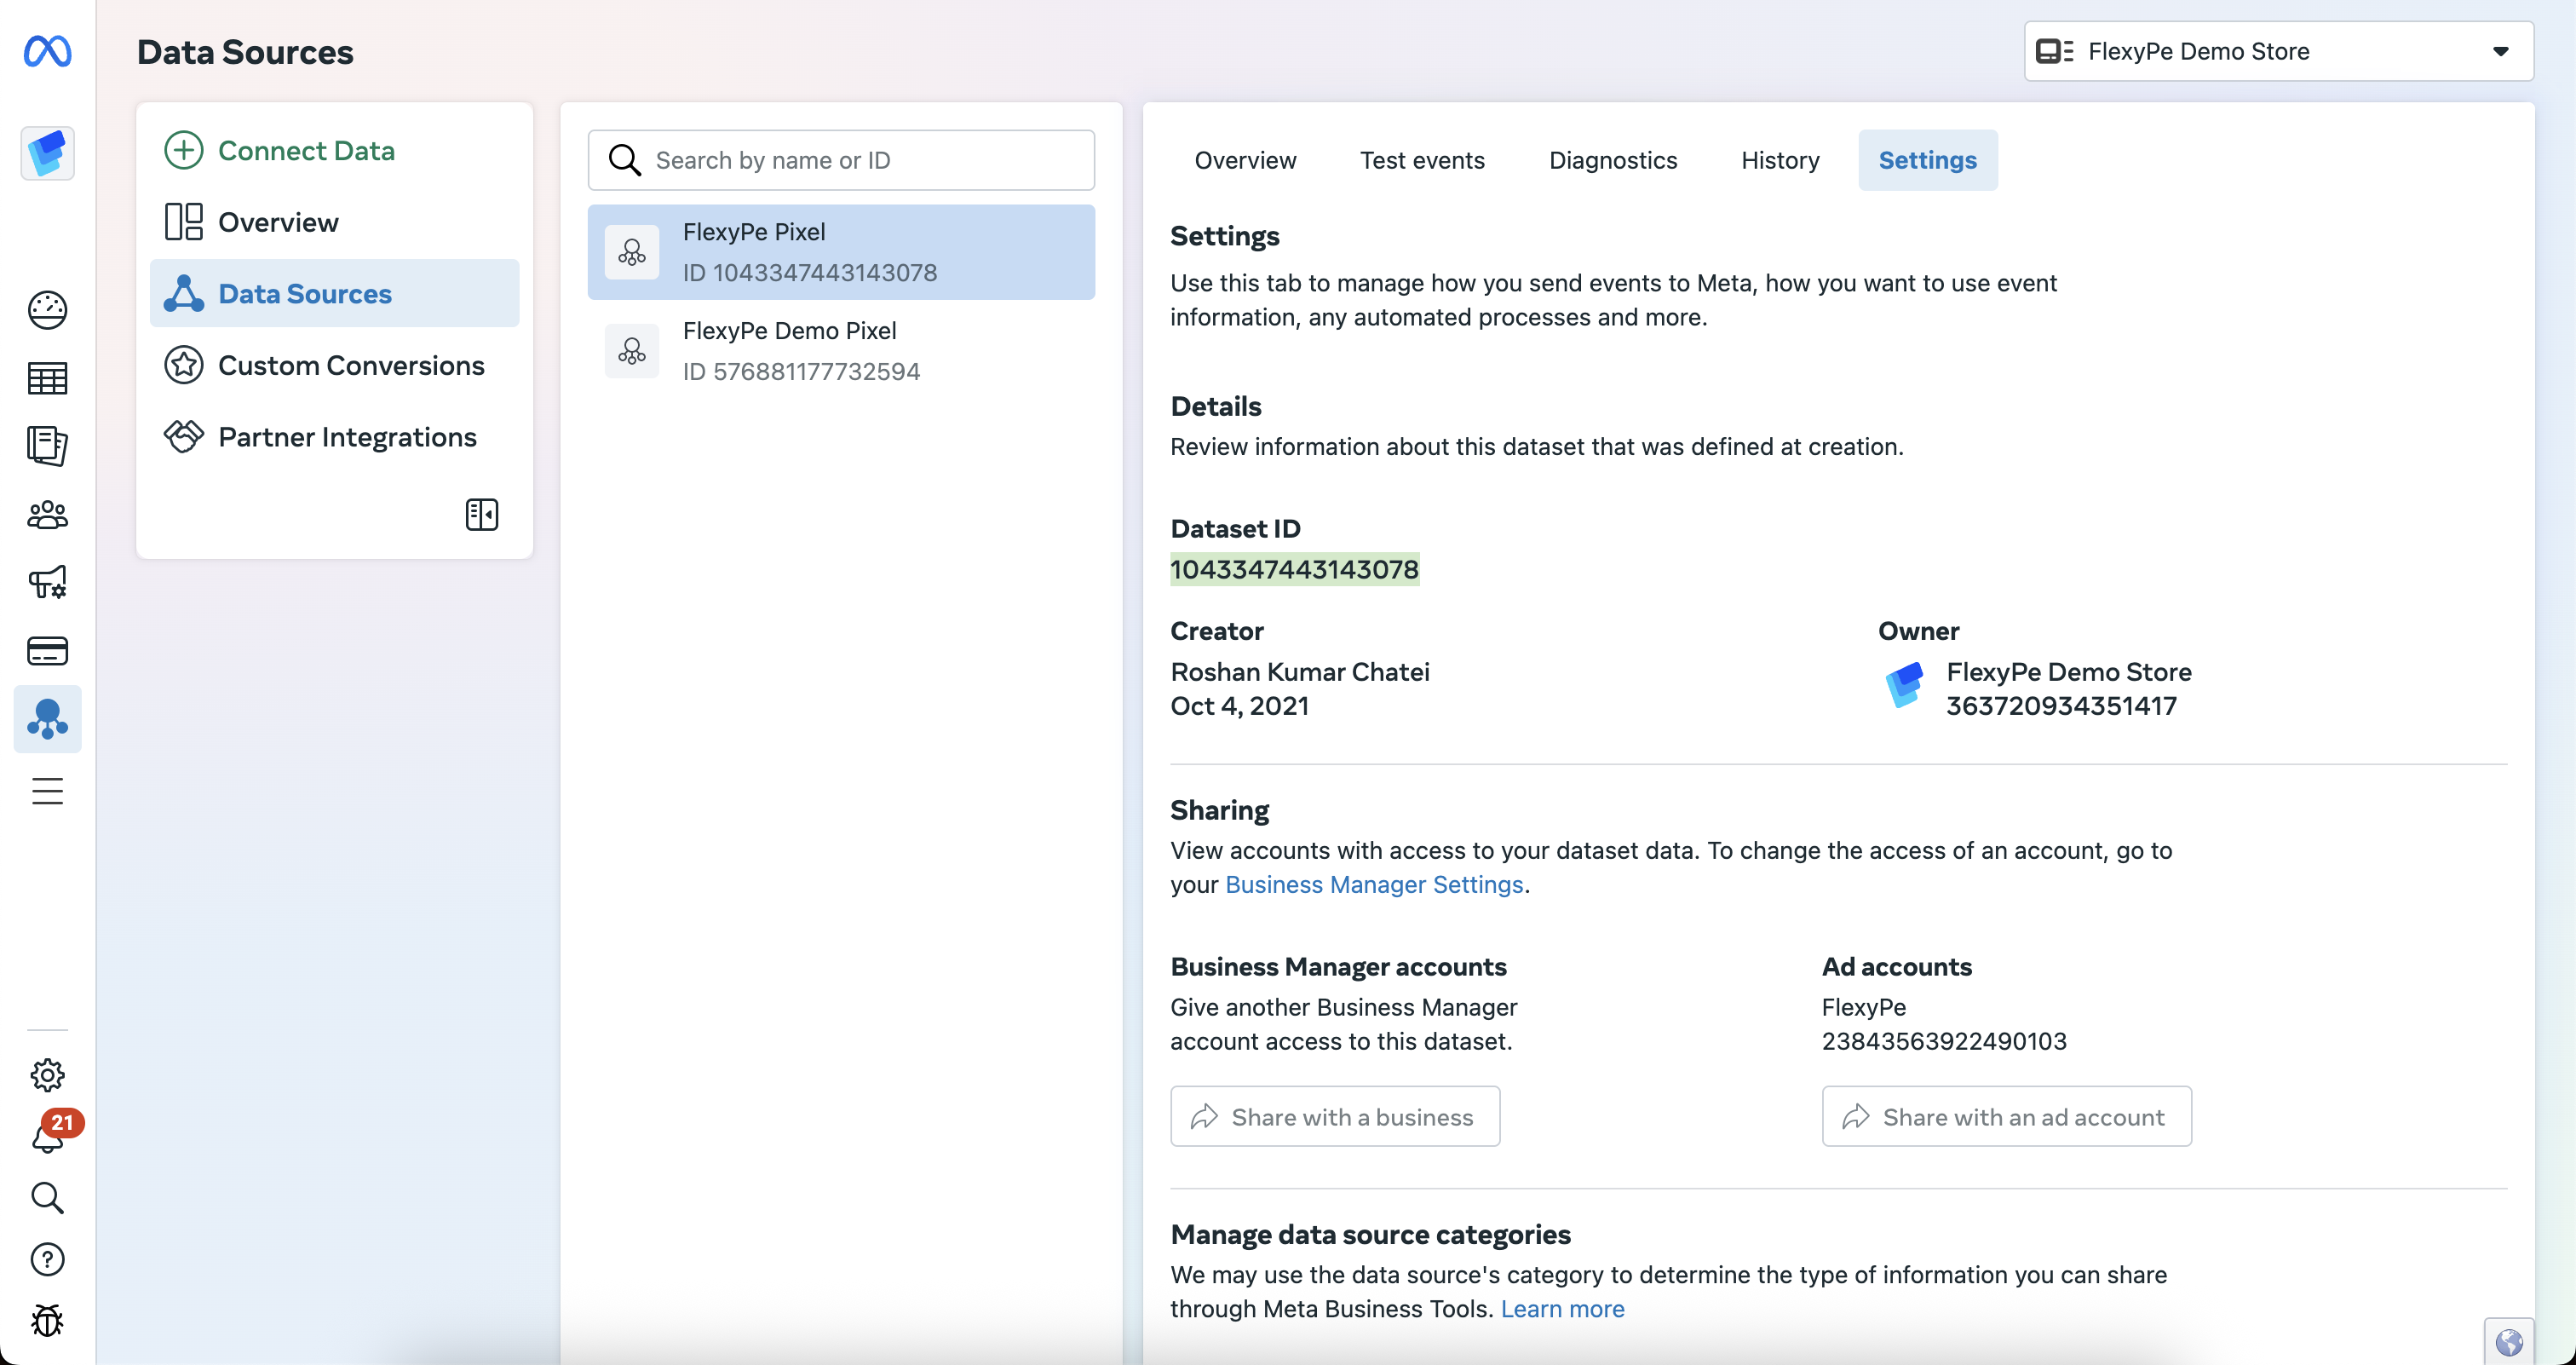
- Navigate to the Settings tab for the selected Shopify pixel.
- Copy the Dataset ID and keep it handy for configuration.
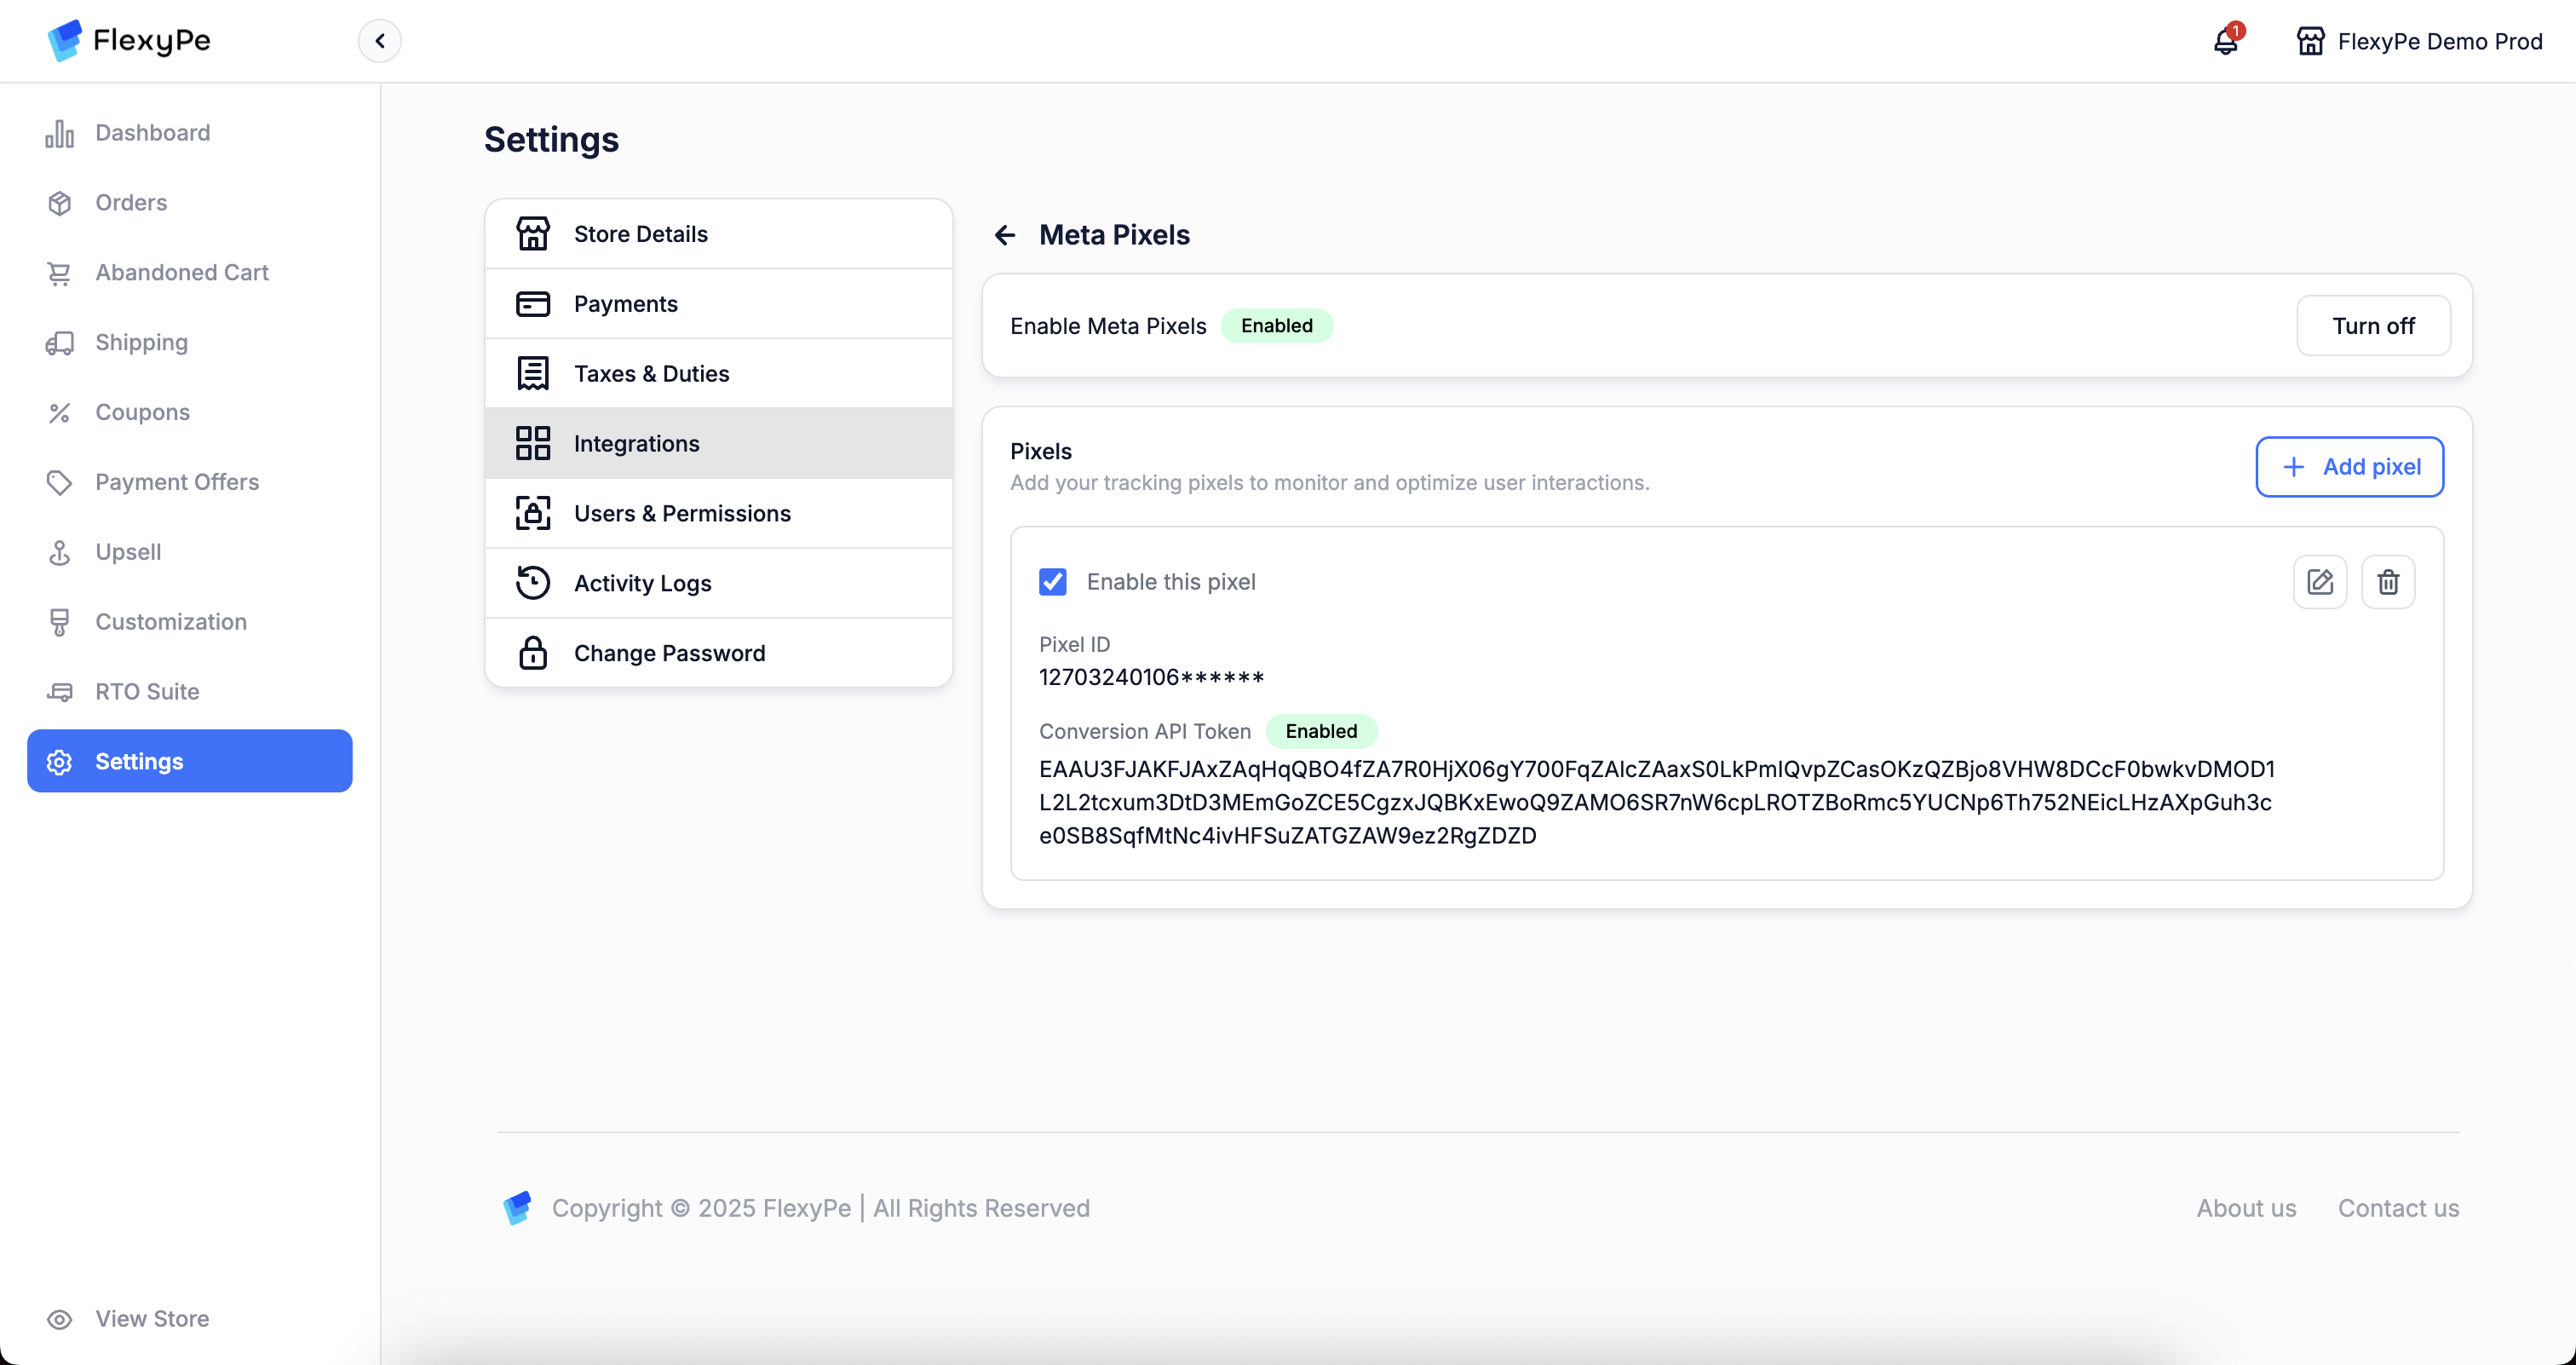
Integrate Meta Pixel with FlexyPe
Access Meta Pixels in FlexyPe Dashboard.
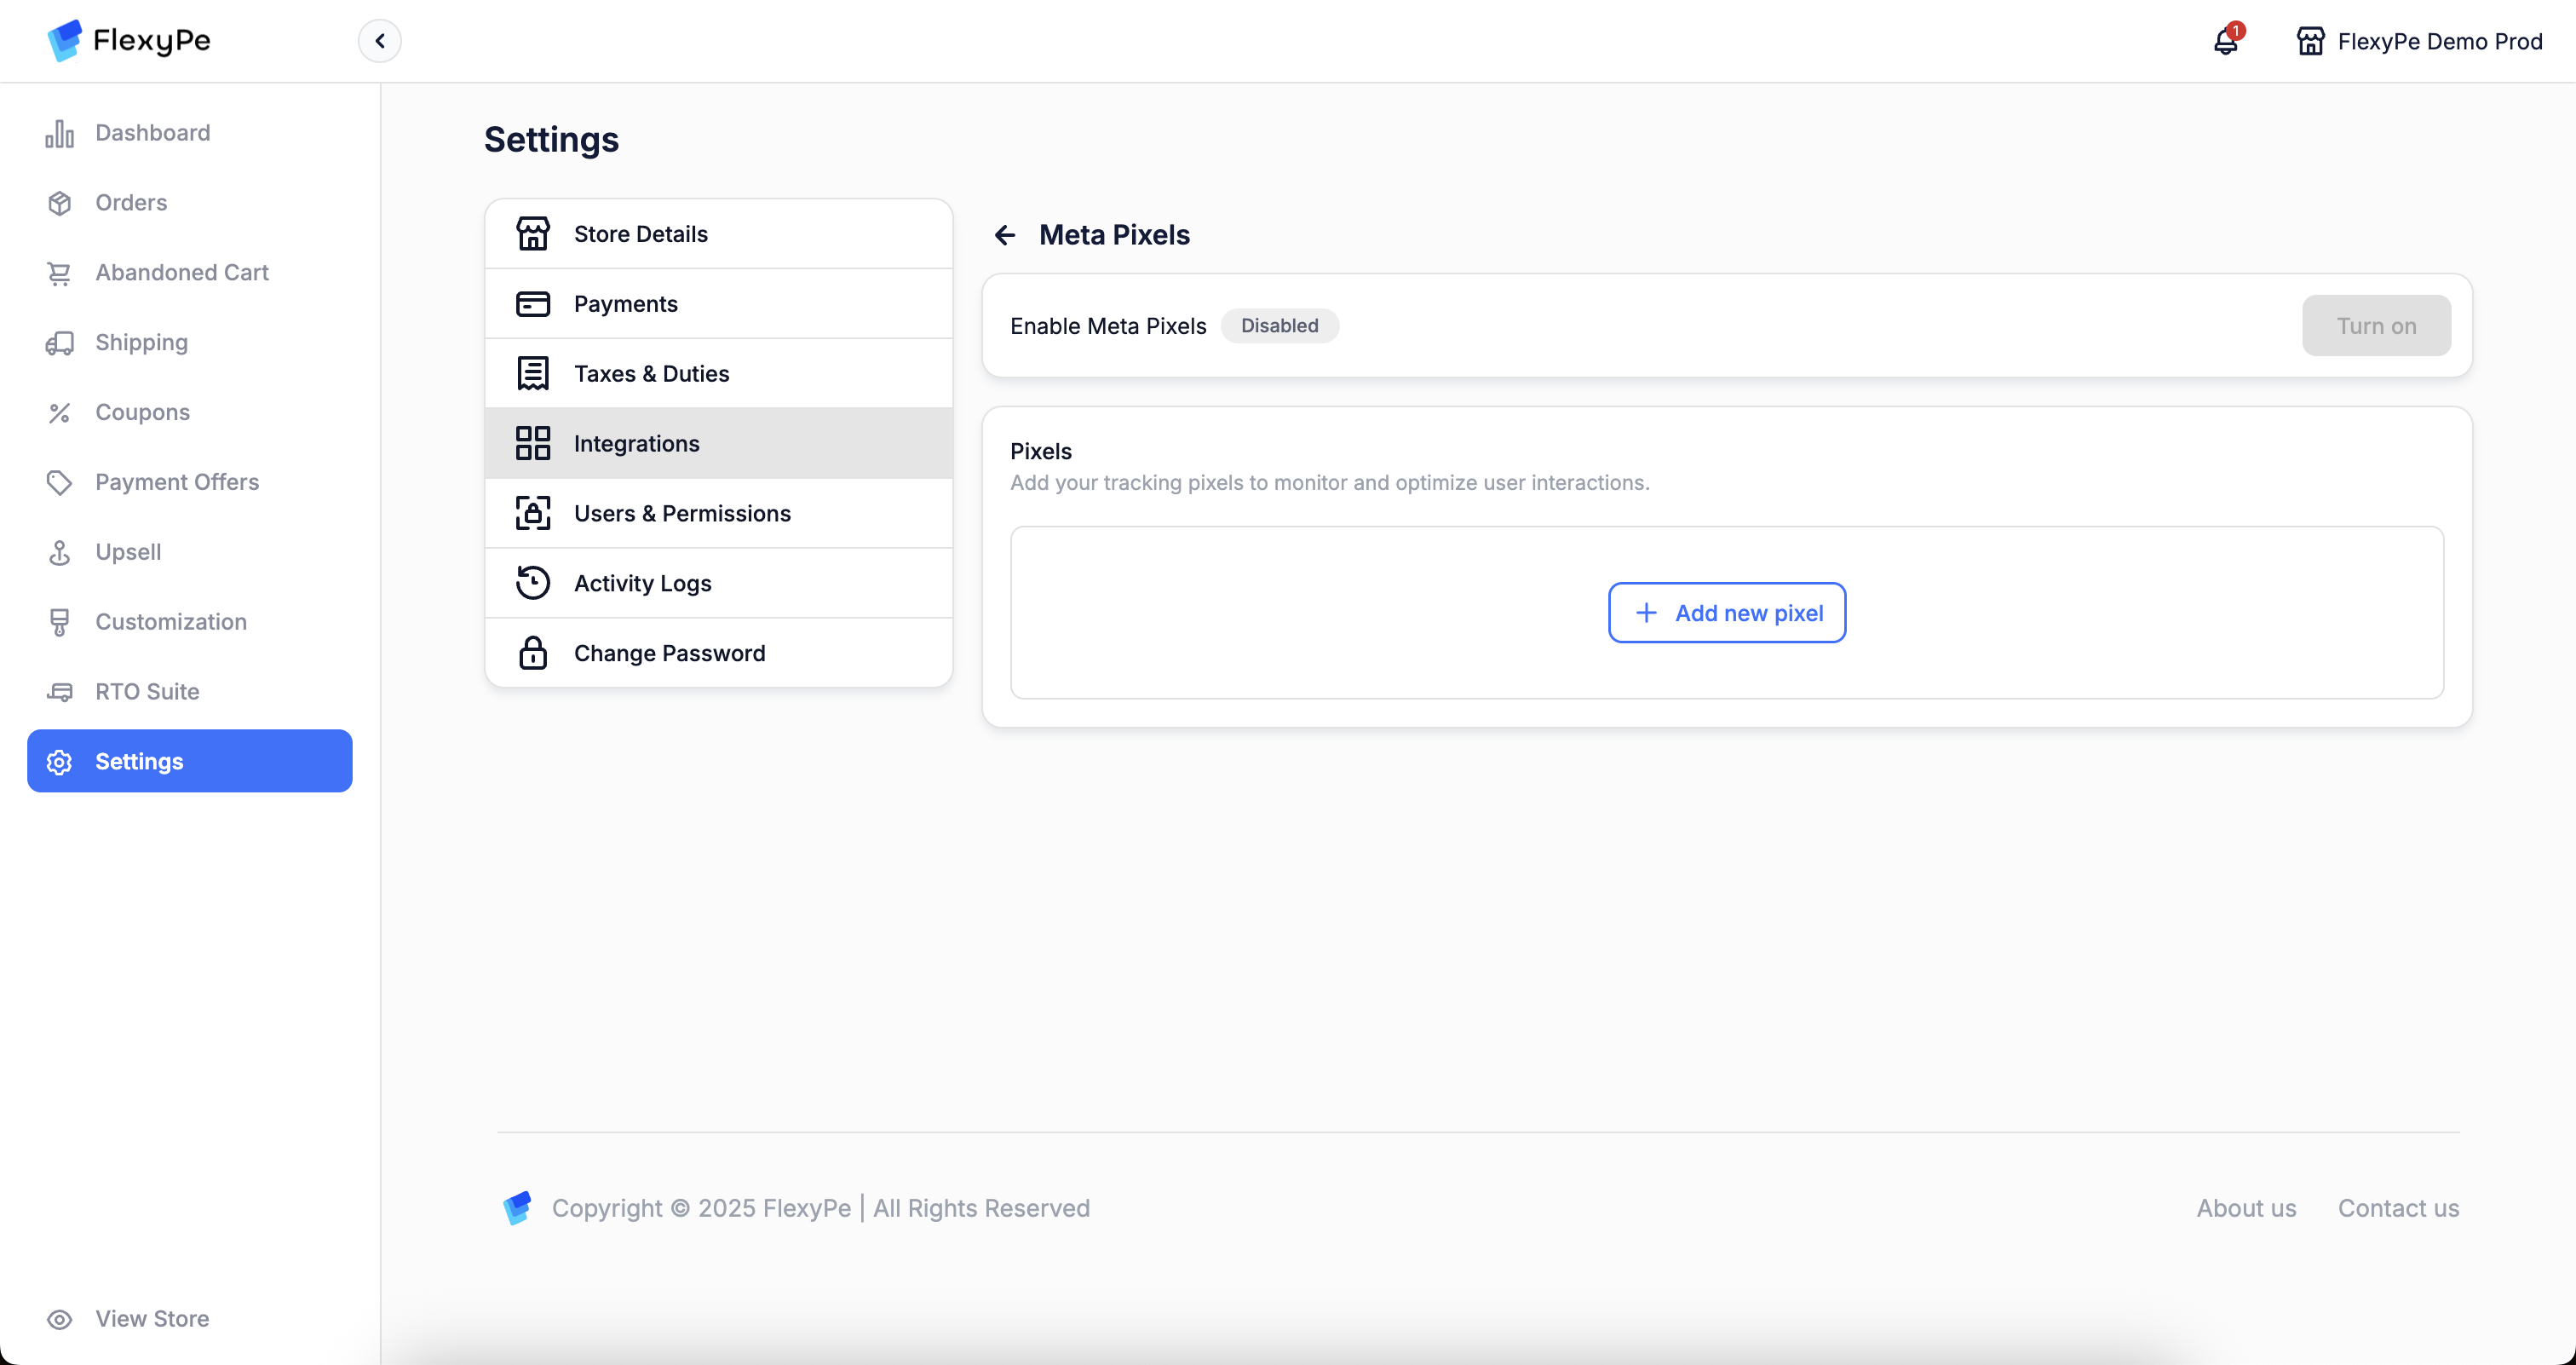
- Log in to your FlexyPe Dashboard.
- Click on the Settings menu and select Integrations.
- Navigate to Meta Pixels.
Configure a new Pixel
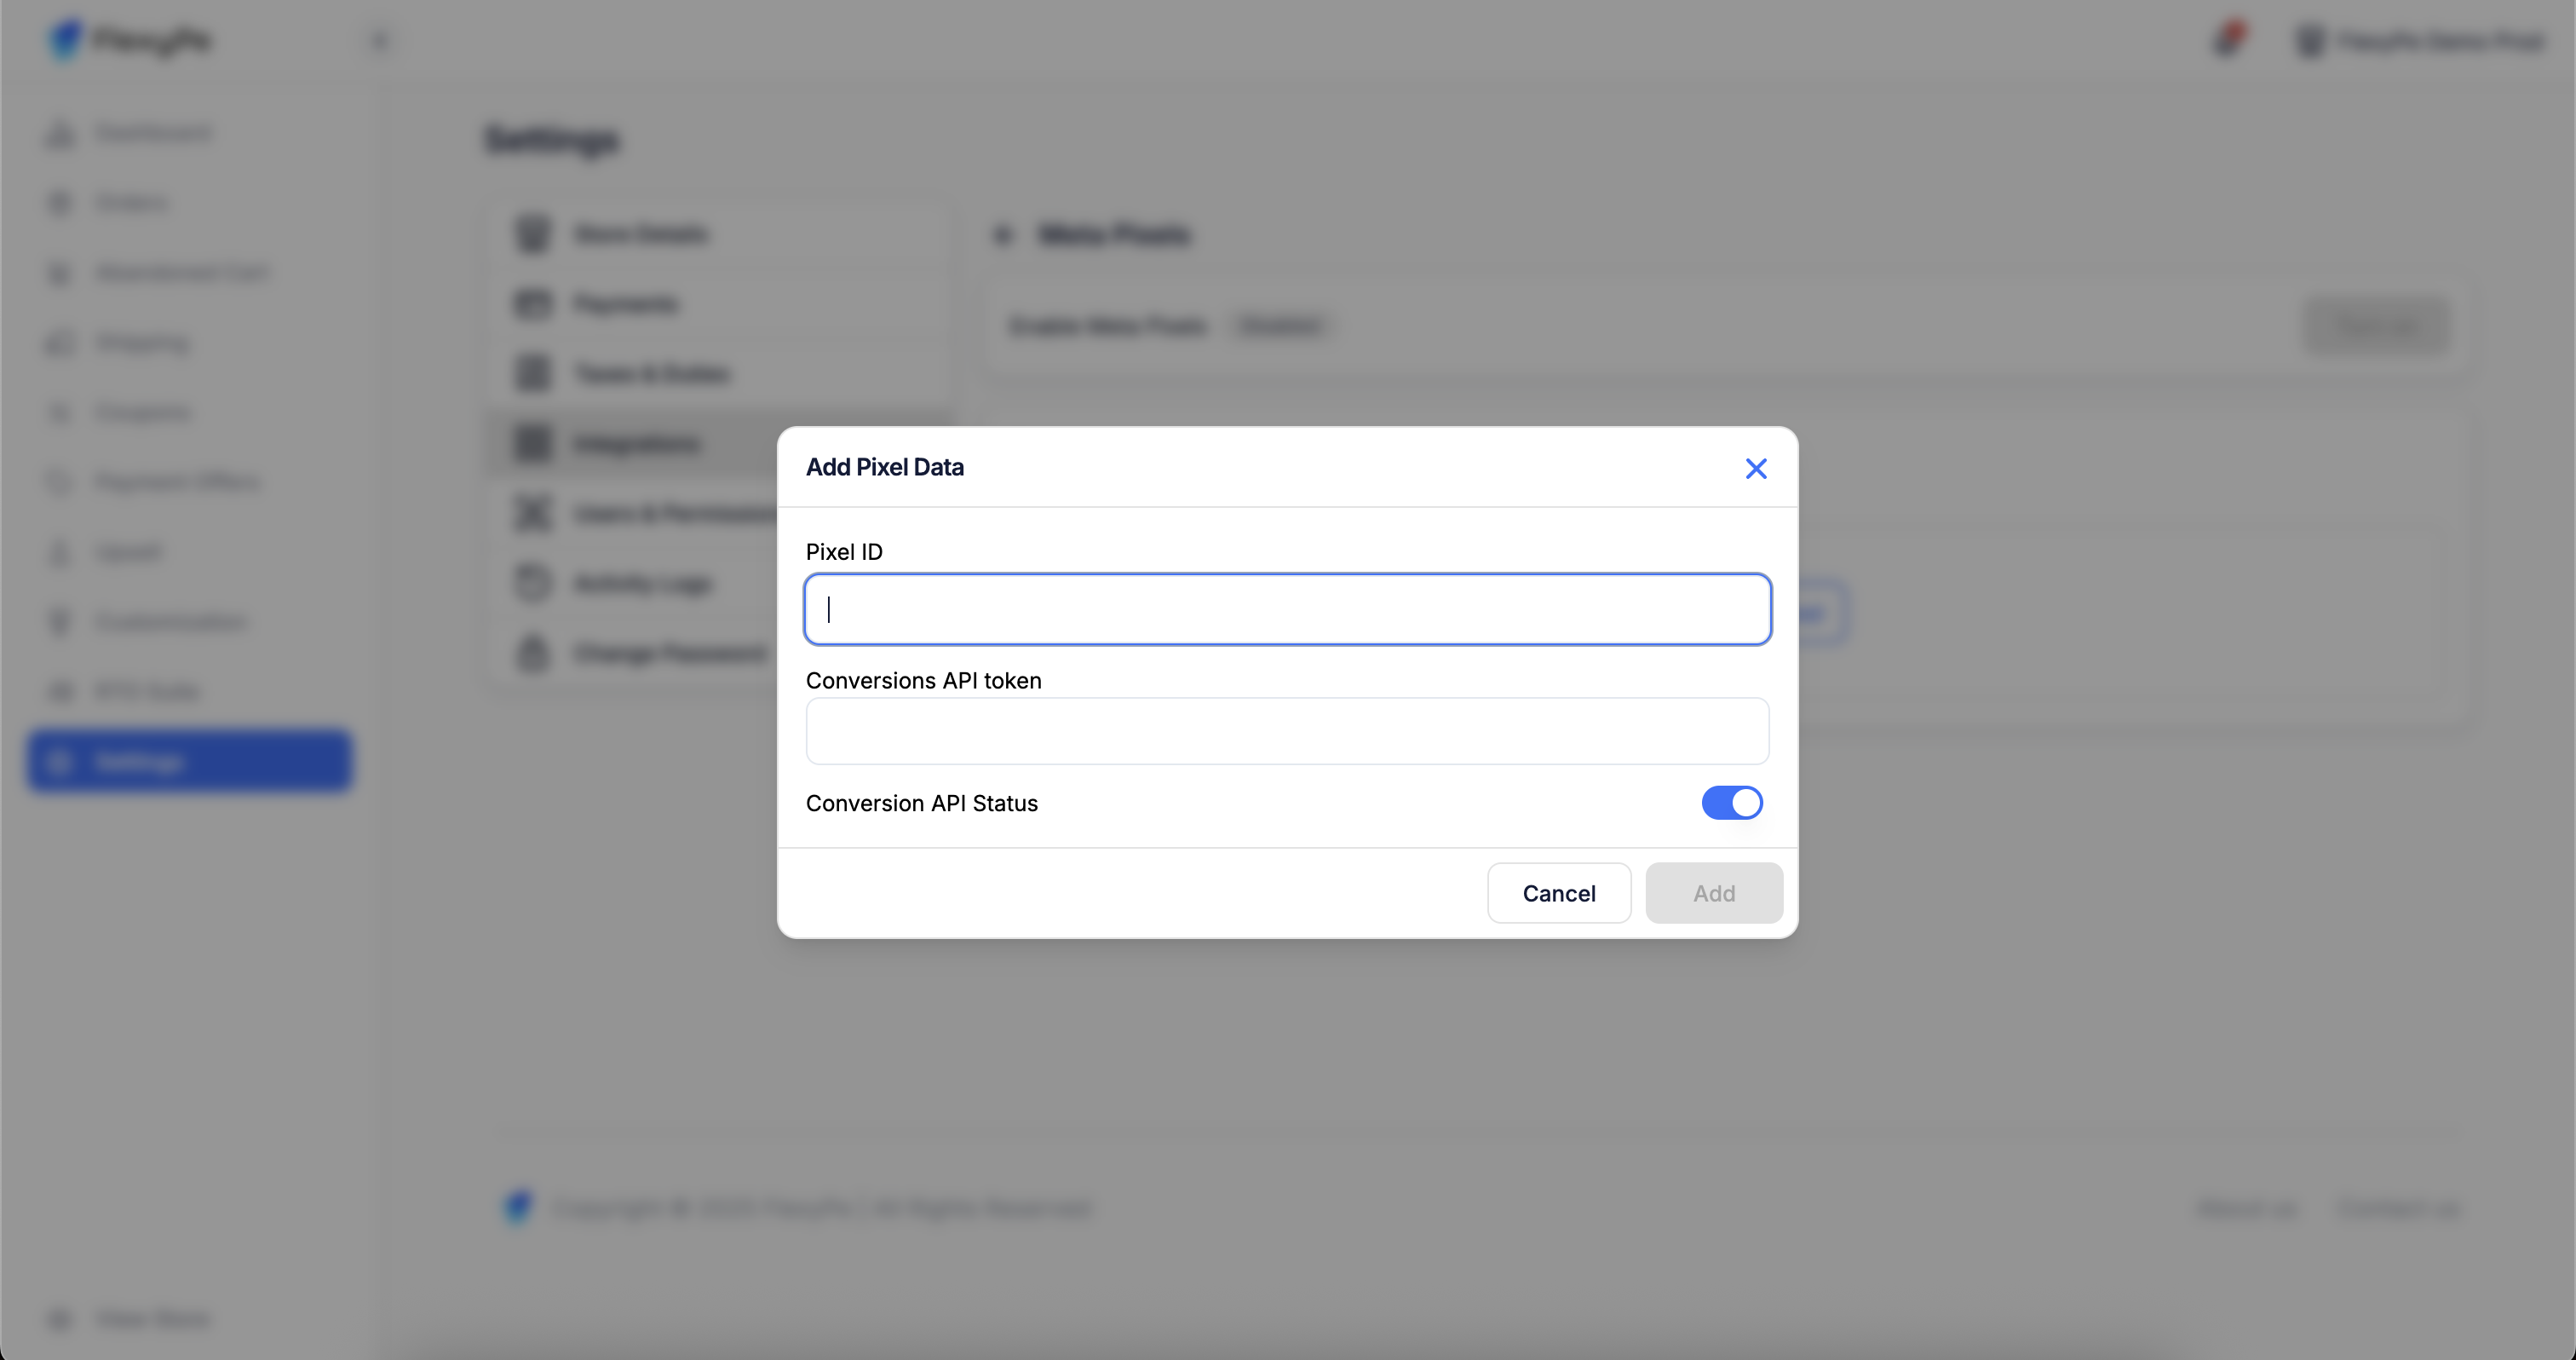
- Click on the Add pixel button.
- Paste the copied Dataset ID into the pixel id field.
- Paste the copied Conversion API into the designated field and turn on the API Status.
- Click Save to finalize the Pixel.