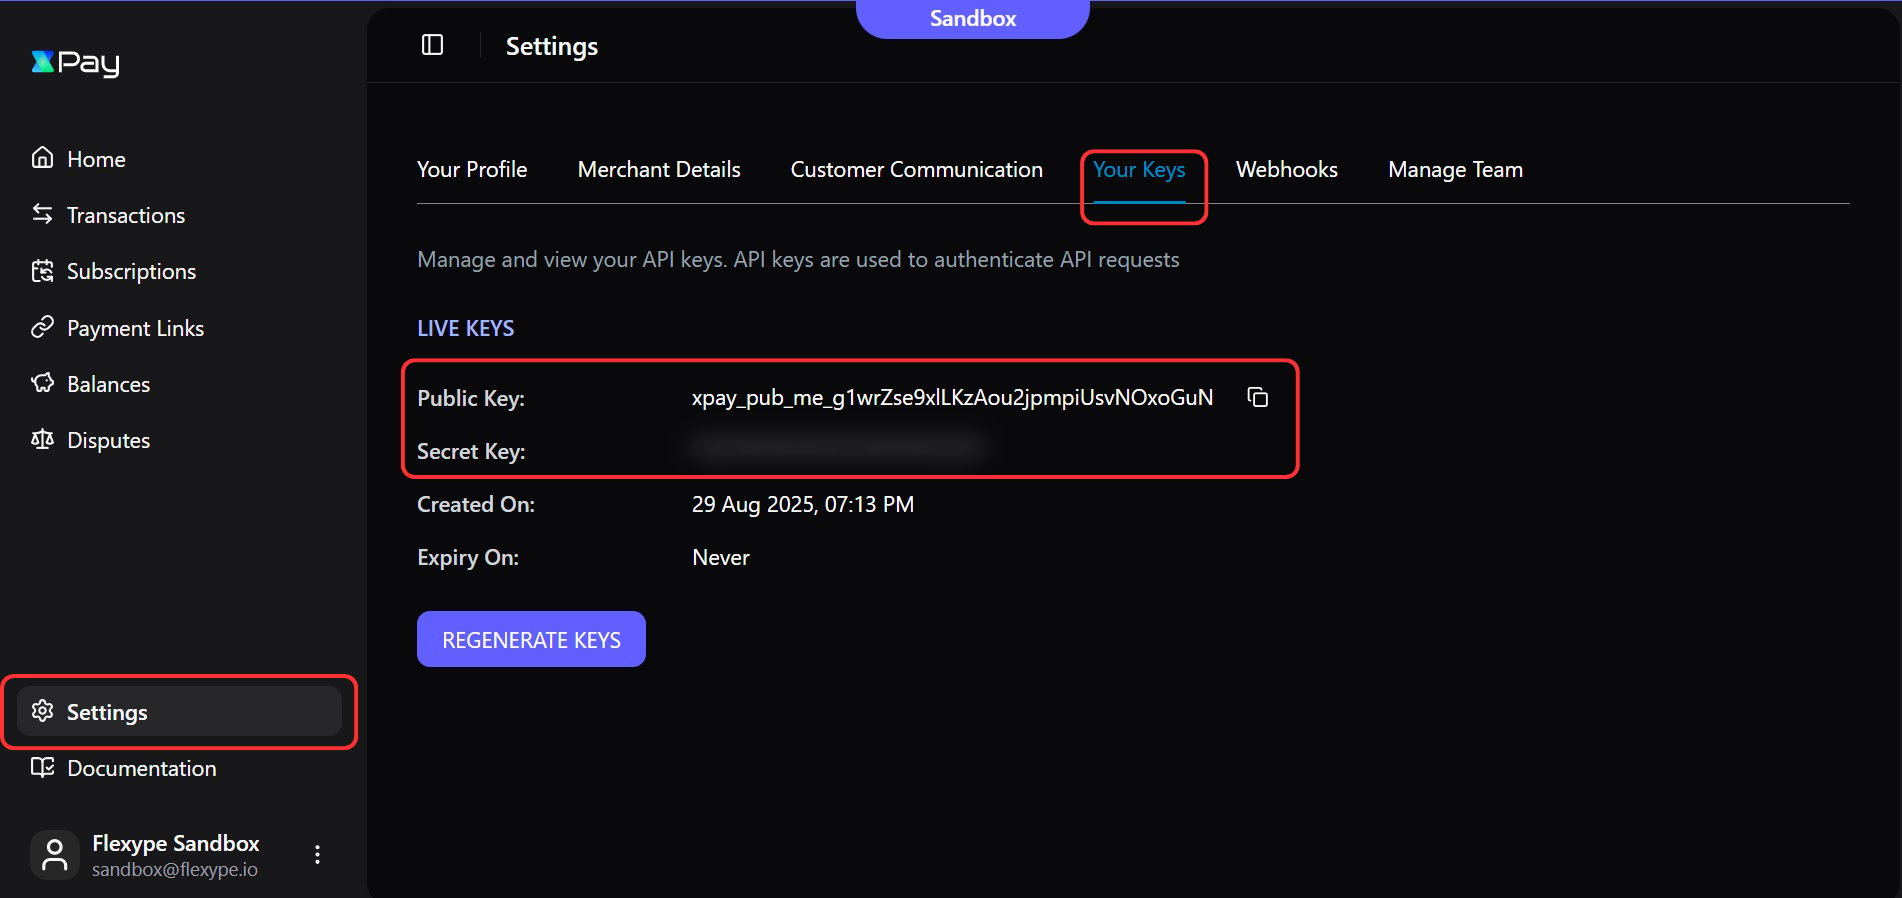
Getting the Public Key and Secret Key
SetUp XPay Webhooks
Add Webhook Endpoint and Events
Webhooks set-up is a mandatory step as it confirms the order creation on your store
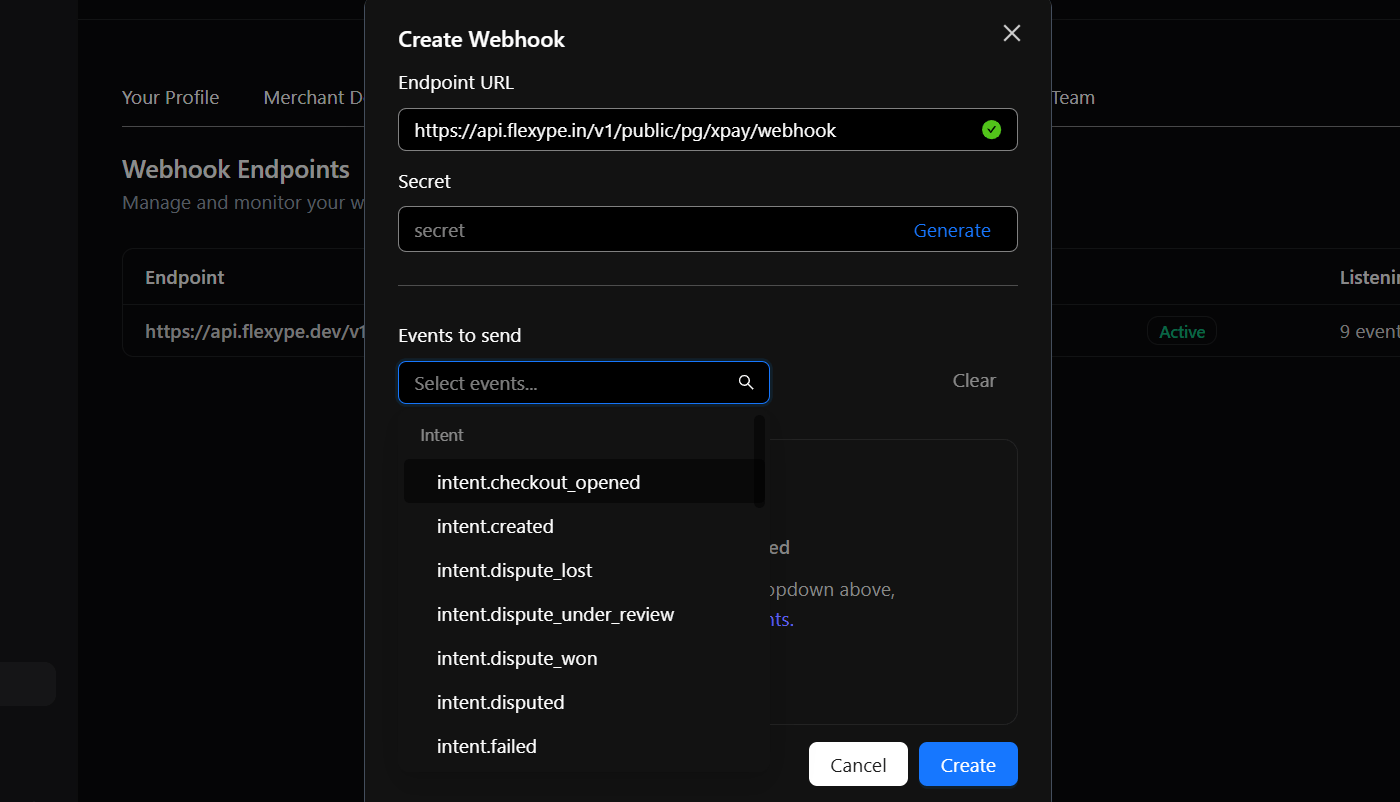
- Paste the above URL in the Endpoint URL field.
- Generate the Secret, copy it, and keep it handy for configuration.
- Under Events to send, enable all events starting with
intent, including:- Intent.checkout_opened
- Intent.created
- Intent.dispute_lost
- Intent.dispute_under_review
- Intent.dispute_won
- Intent.disputed
- Intent.failed
- Intent.refunded
- Intent.success
- Click Create to complete the webhook setup.
Integrate XPay with FlexyPe
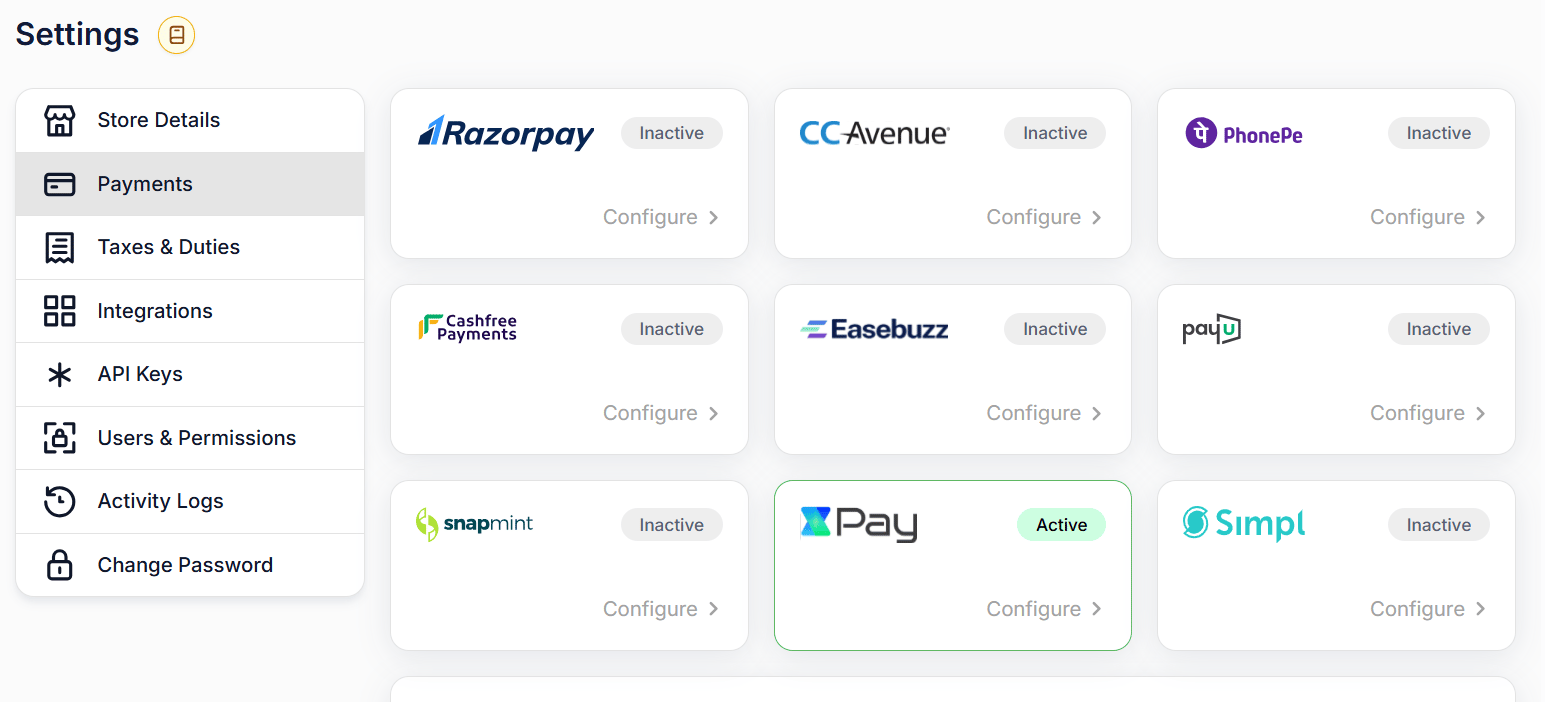
Access Payments in FlexyPe Dashboard

- Log in to your FlexyPe Dashboard.
- Click on the Settings menu from left.
- Select Payments.
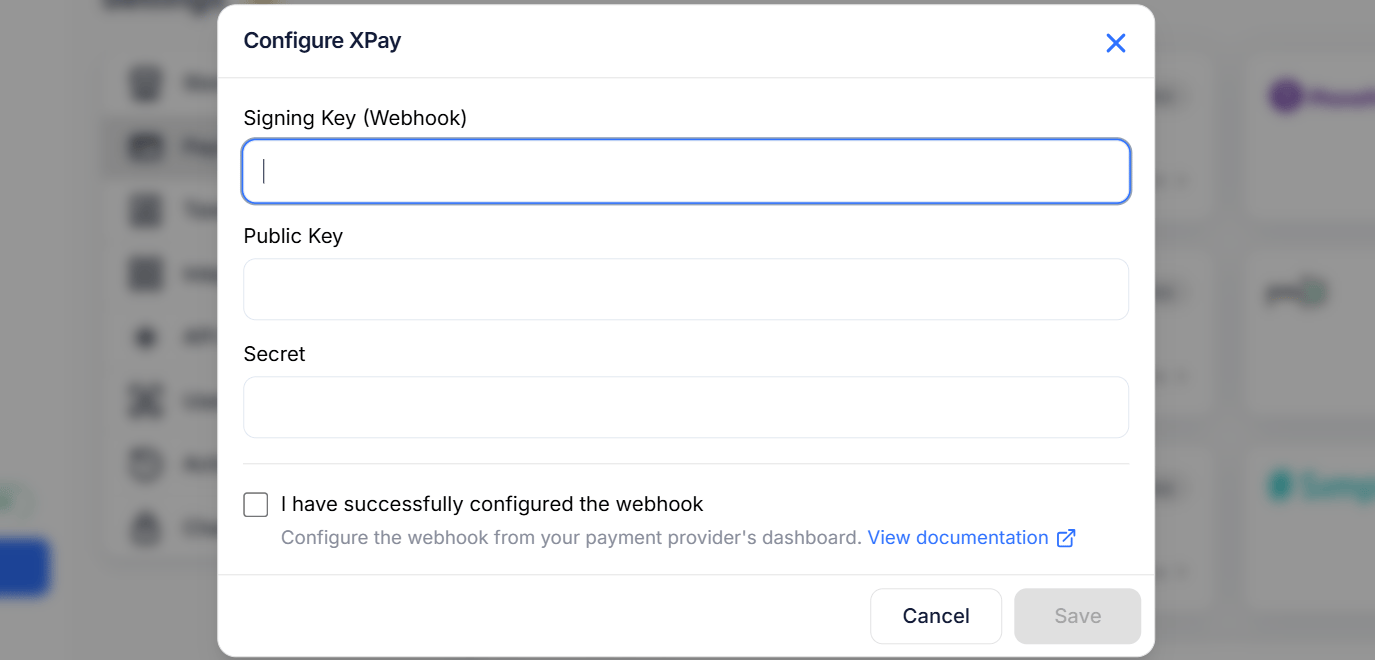
Configure XPay
- Click the Configure button within the XPay card.
- Paste the Webhook Secret (Webhook tab) into the Signing Key (Webhook) field.
- Paste the copied Public Key (Your keys tab) into the Public Key field.
- Paste the copied Secret Key (Your keys tab) into the Secret field.
-
Click Save to complete the configuration.