Documentation Index
Fetch the complete documentation index at: https://docs.flexype.io/llms.txt
Use this file to discover all available pages before exploring further.
Step 1: Access and Sync Shipping Profiles
Navigate to Shipping in the left menu to view your profiles. Sync from Shopify for instant alignment of zones and rates, or use Add Shipping Zone to build custom ones.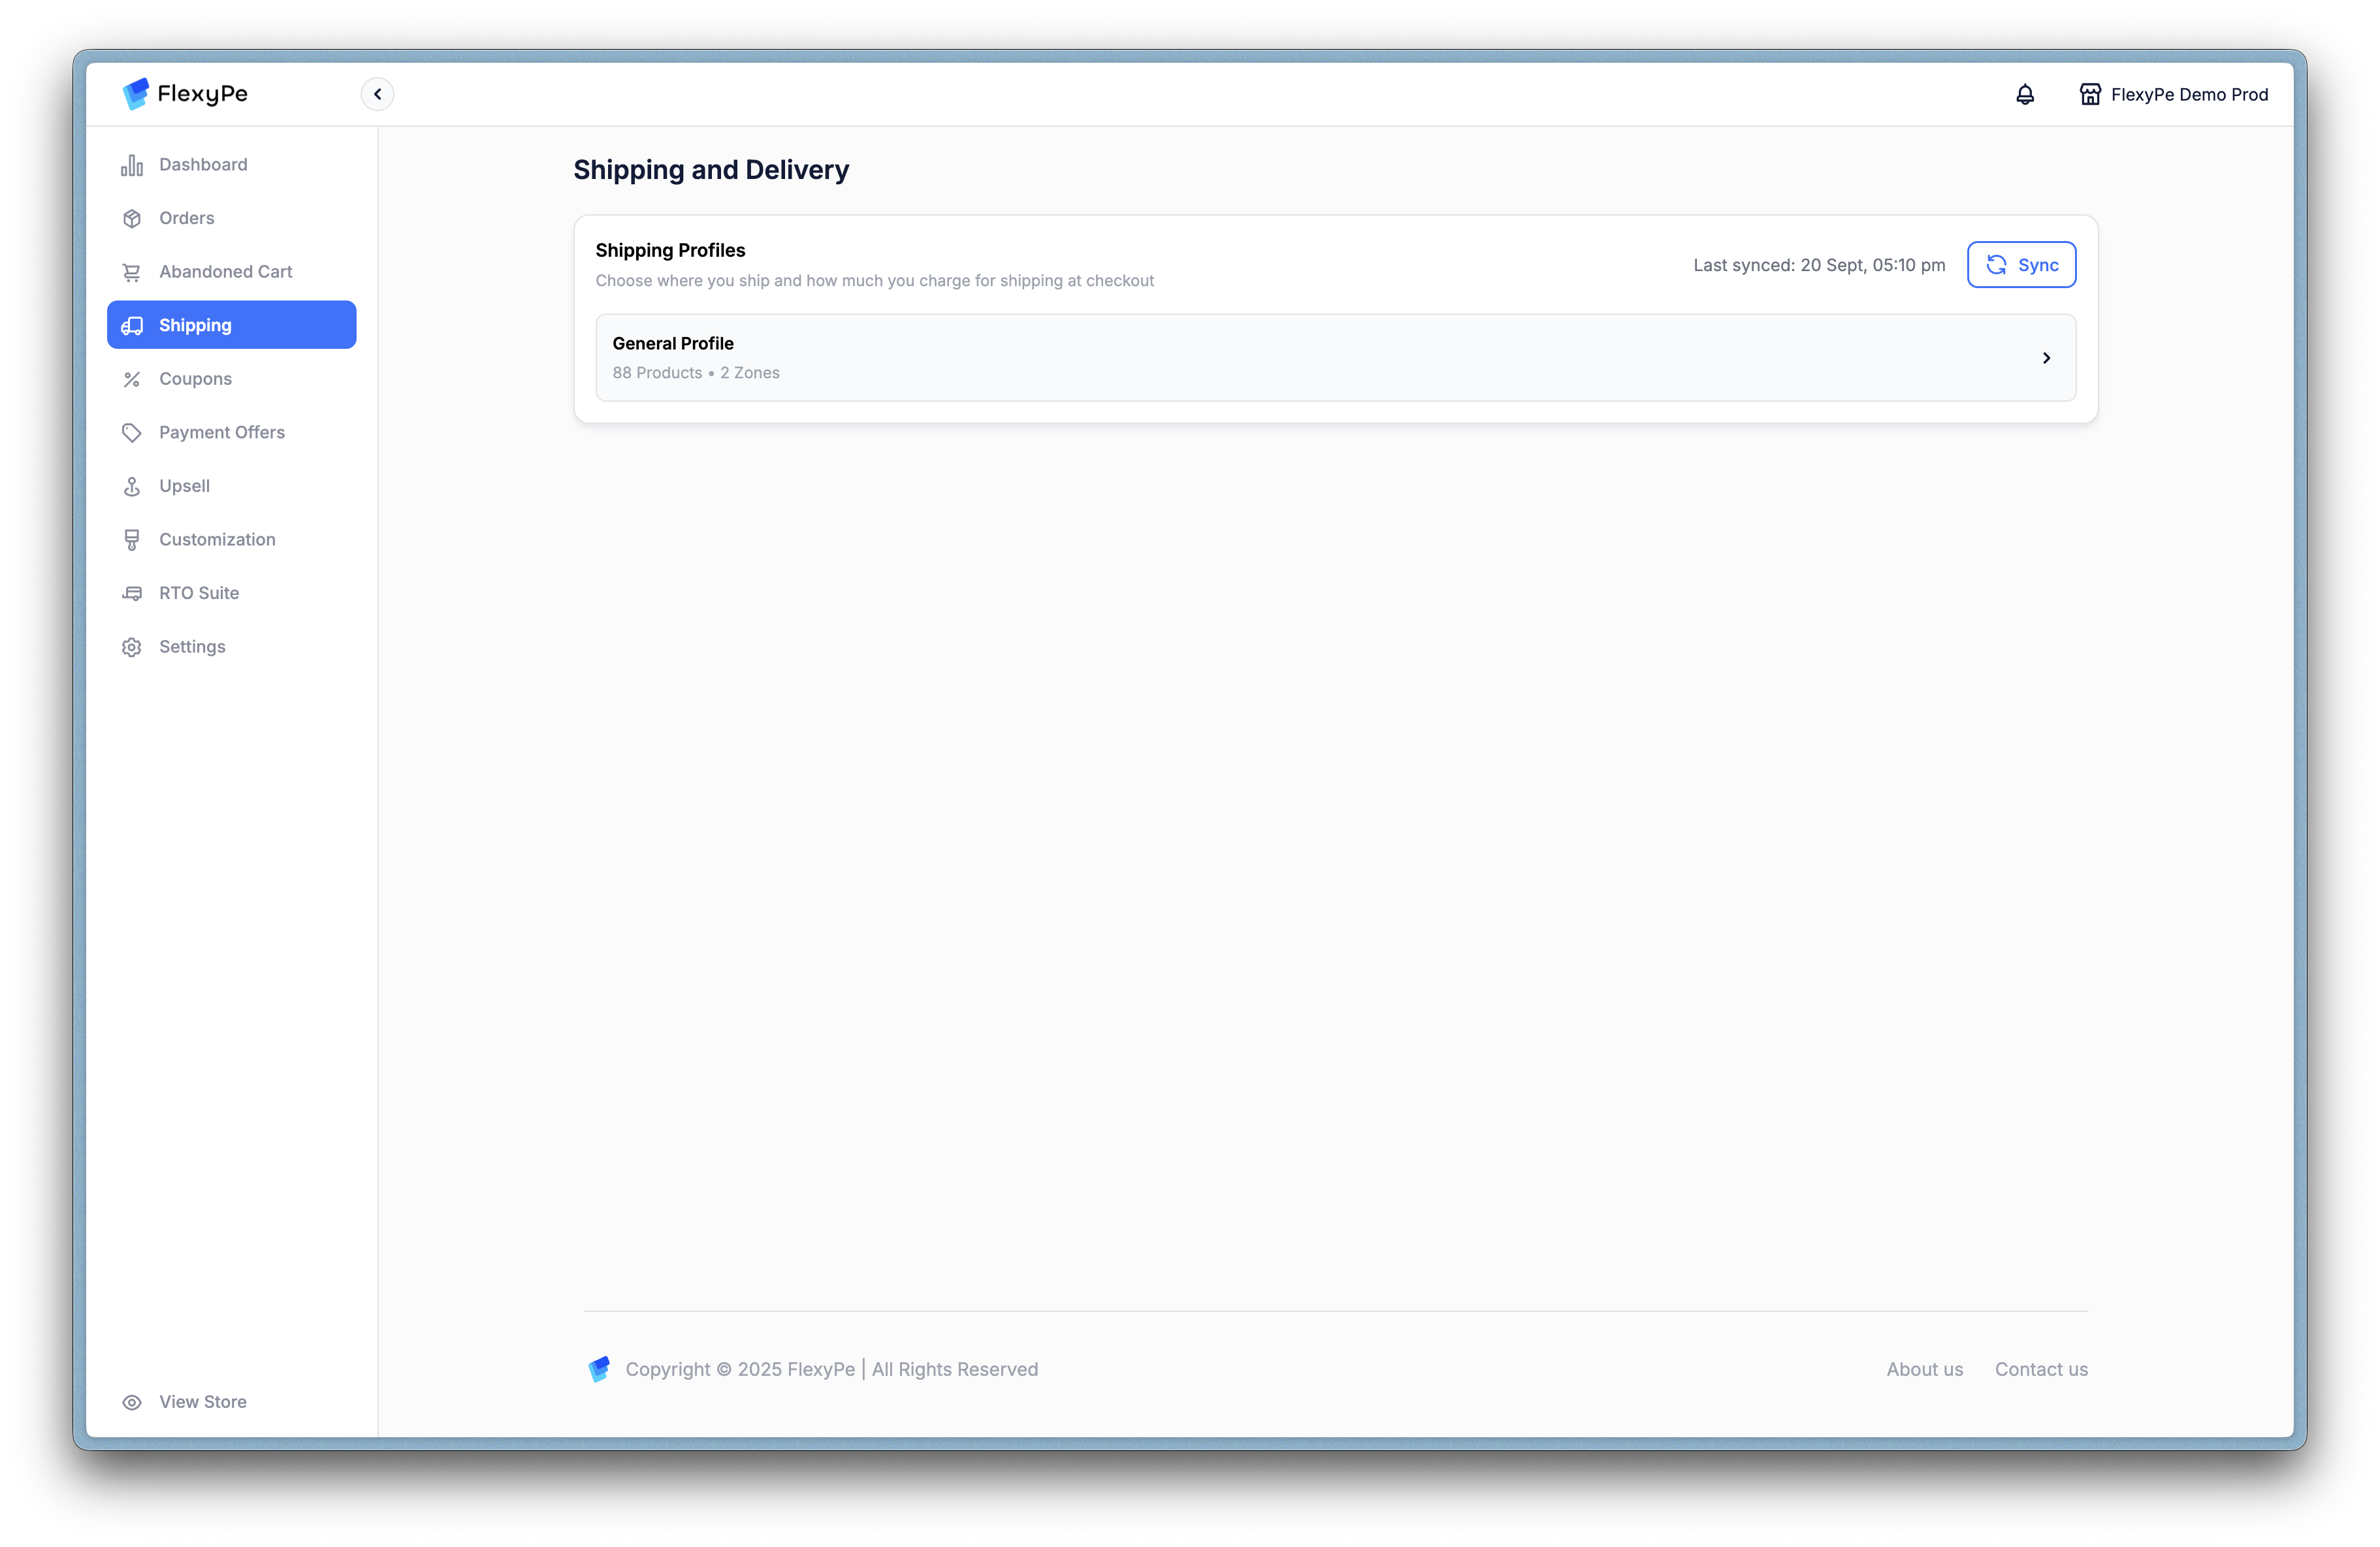
Step 2: Explore Shipping Zones
Within a profile (e.g., General Profile), review zones like Domestic or International. Each displays rate names, delivery estimates, price ranges, COD status, and quick actions for edits or toggles.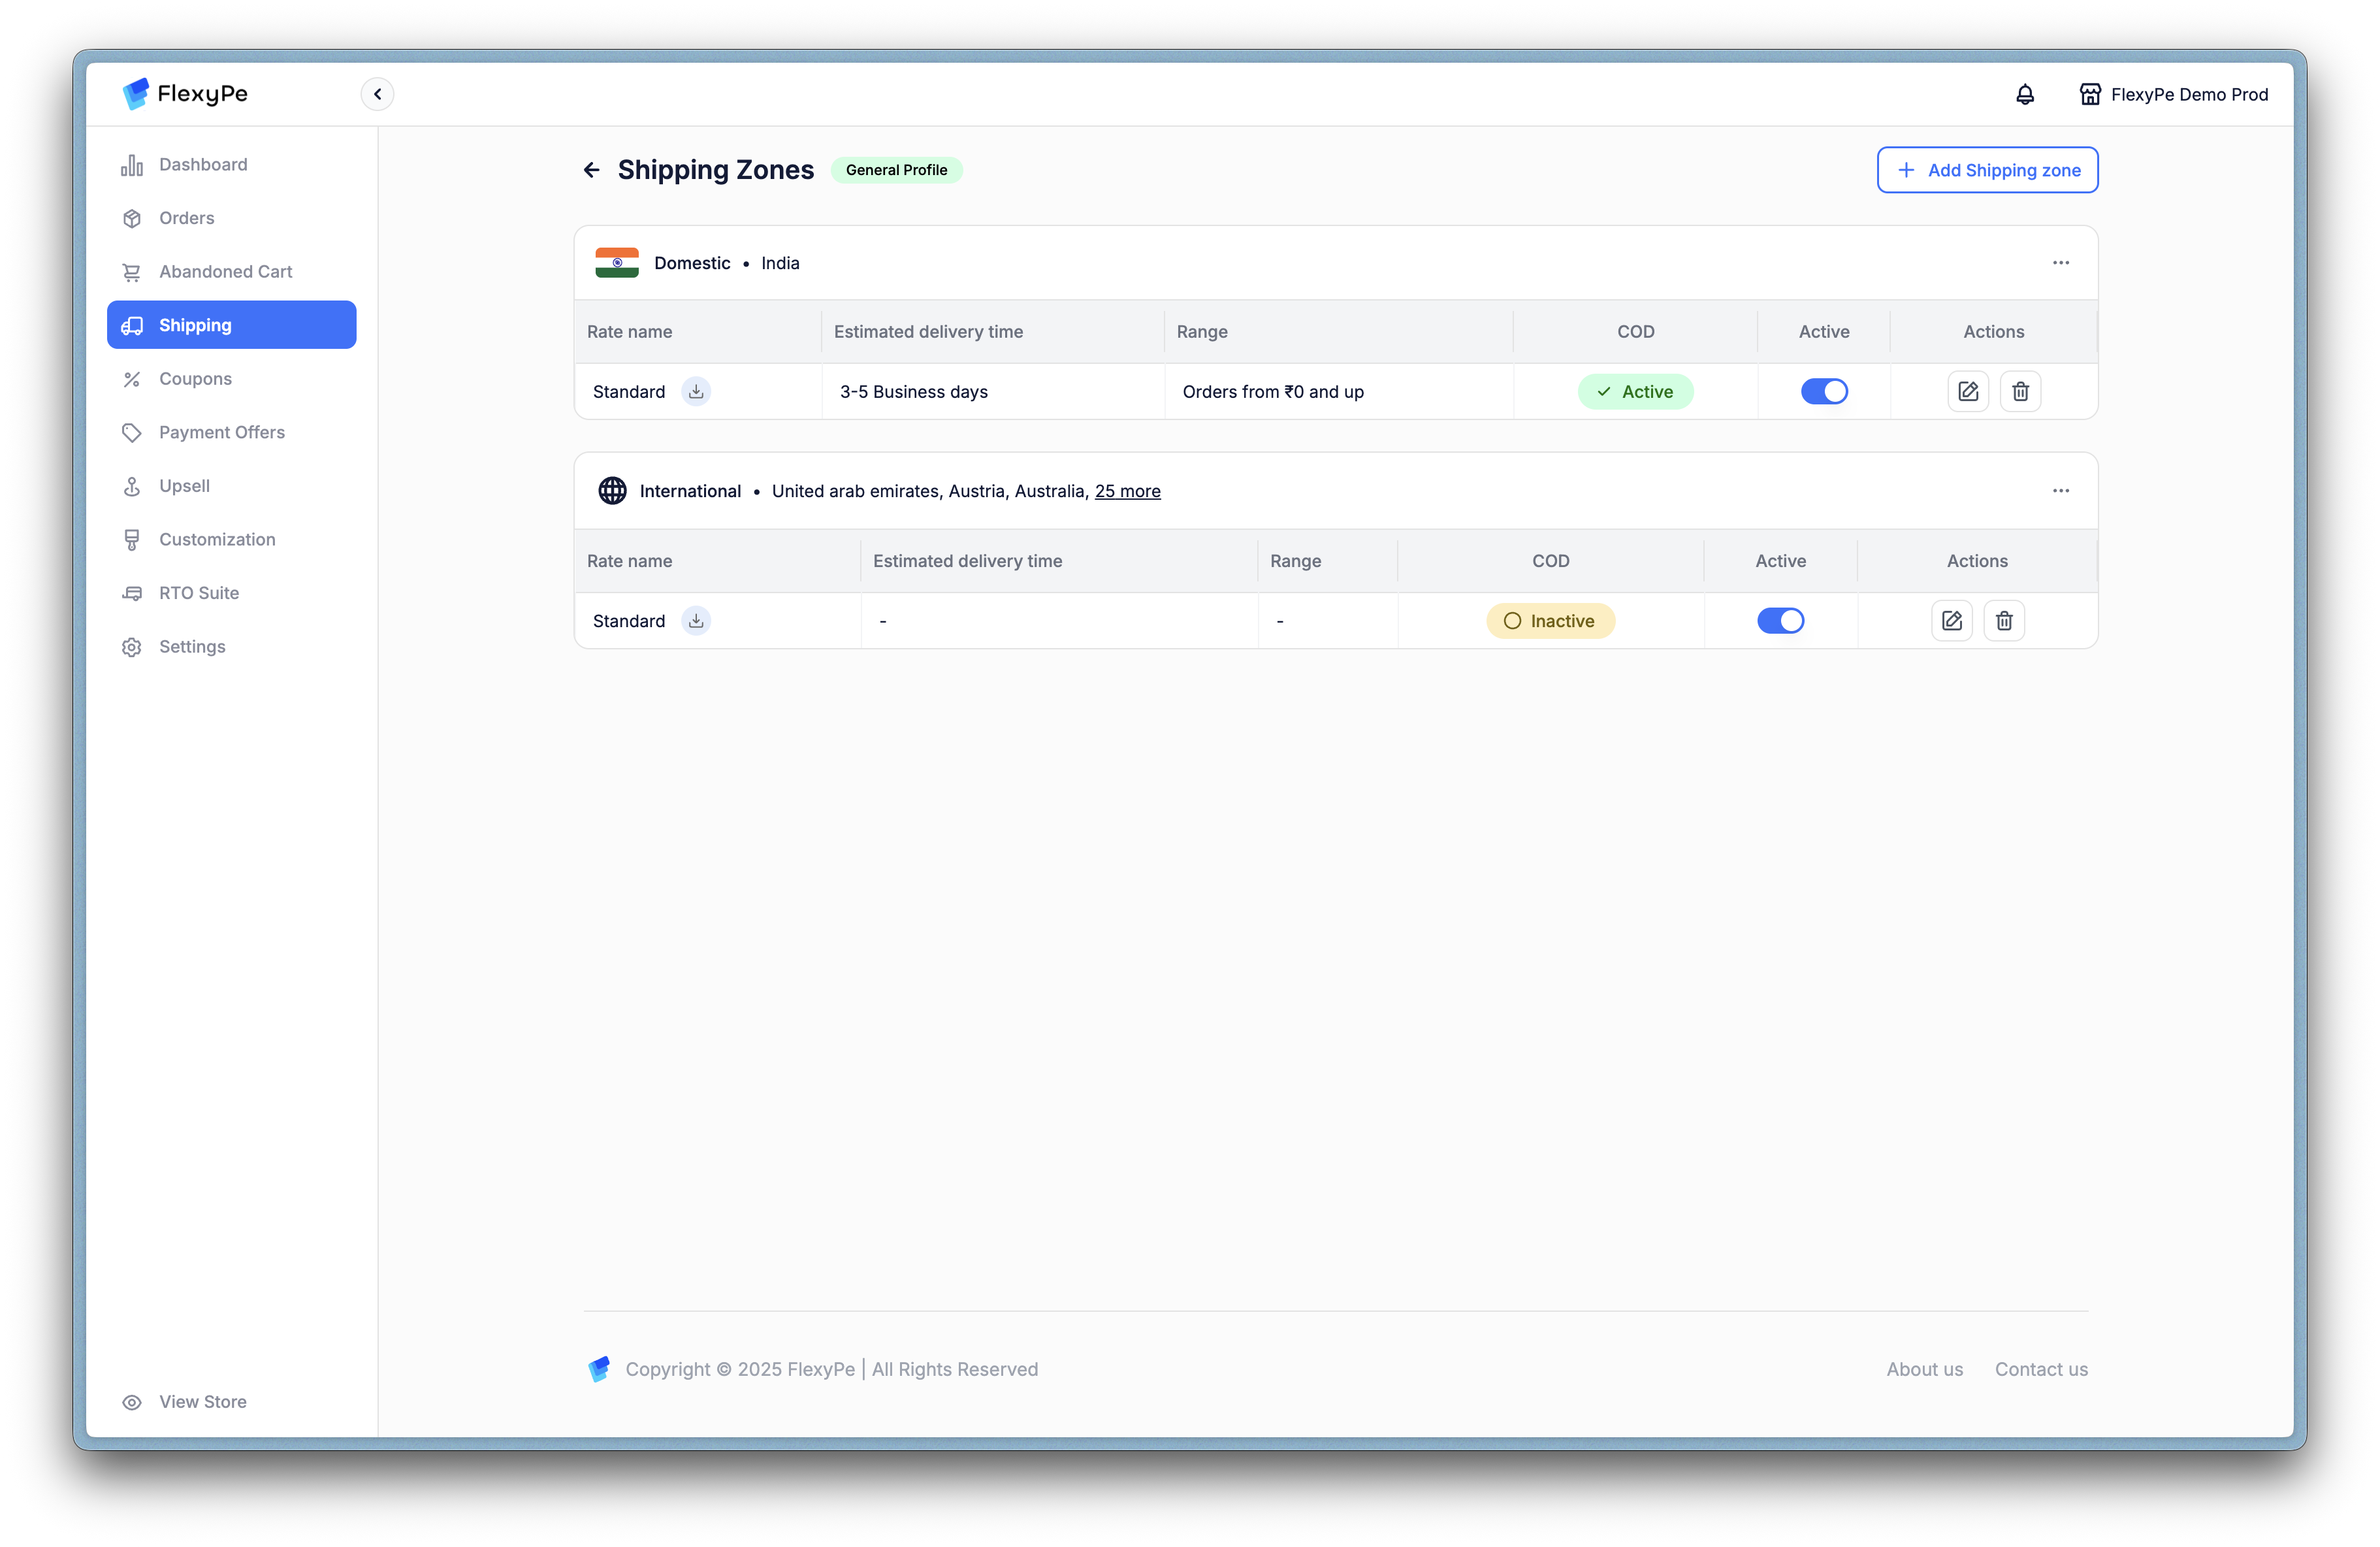
Step 3: Build a New Shipping Zone
Select Add Shipping Zone to create targeted delivery areas. Name the zone internally, then choose State & Country for broad coverage or Pincode for specifics—select multiples or upload CSVs for efficiency.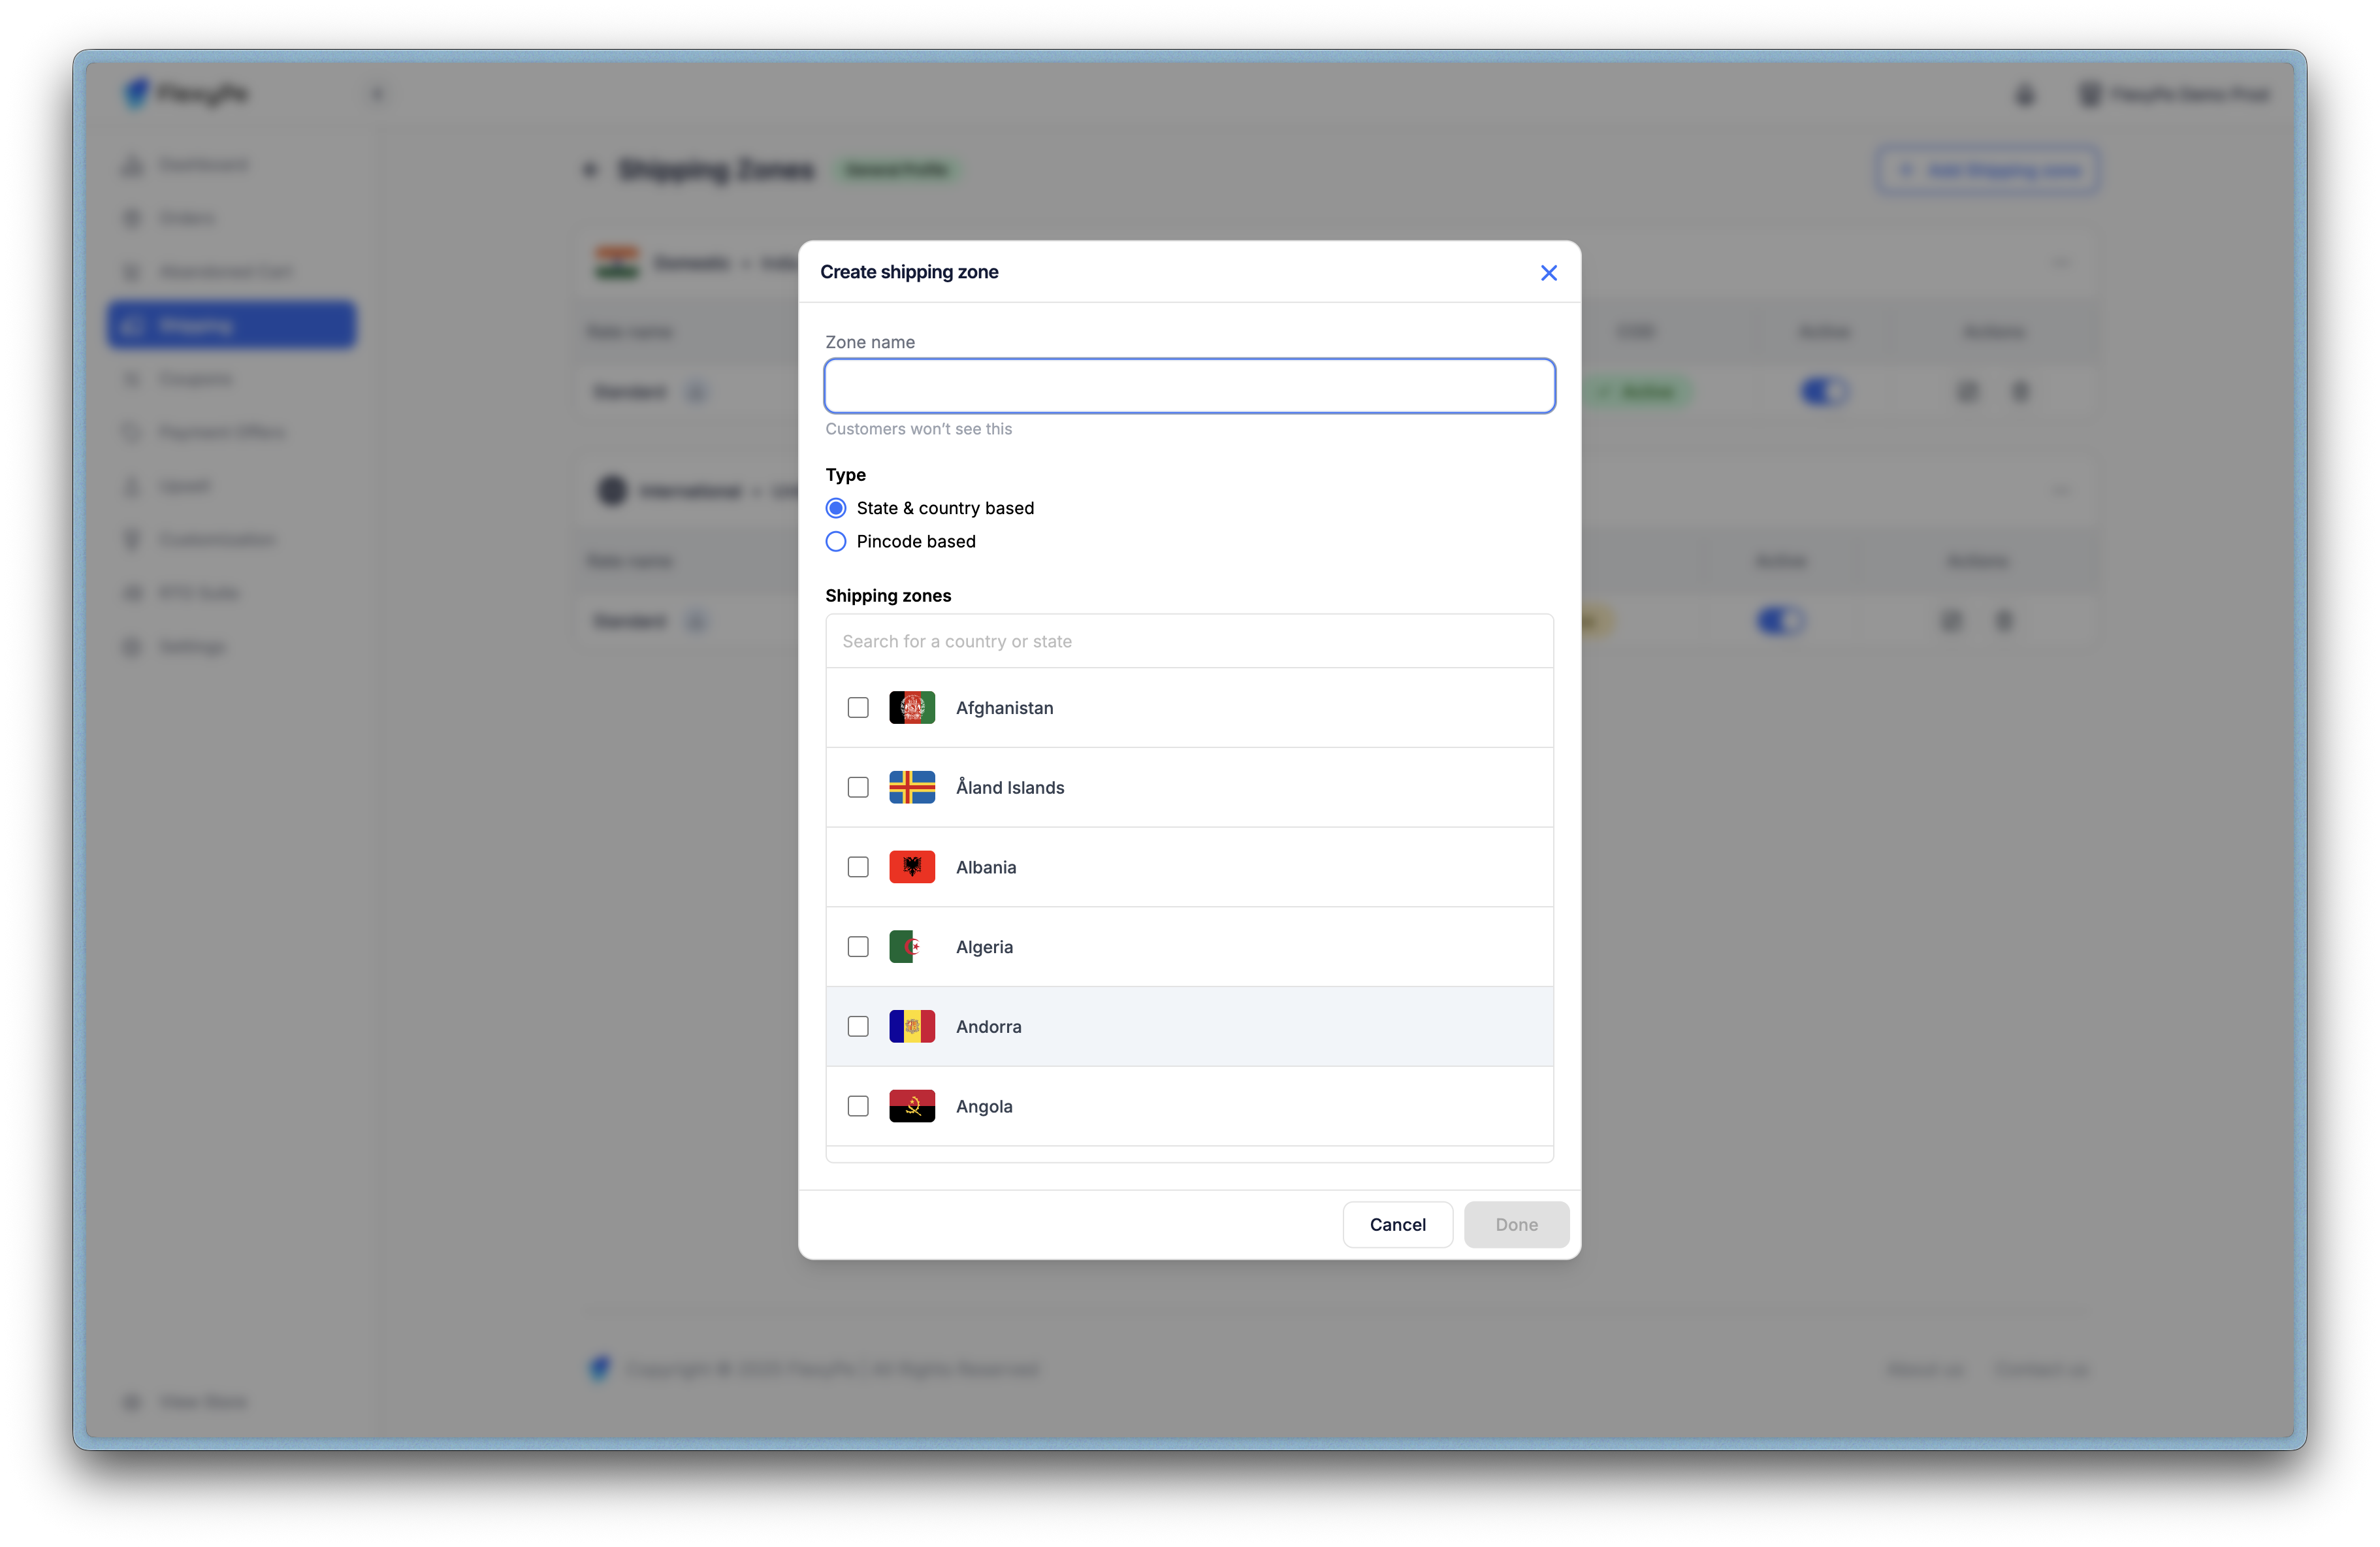
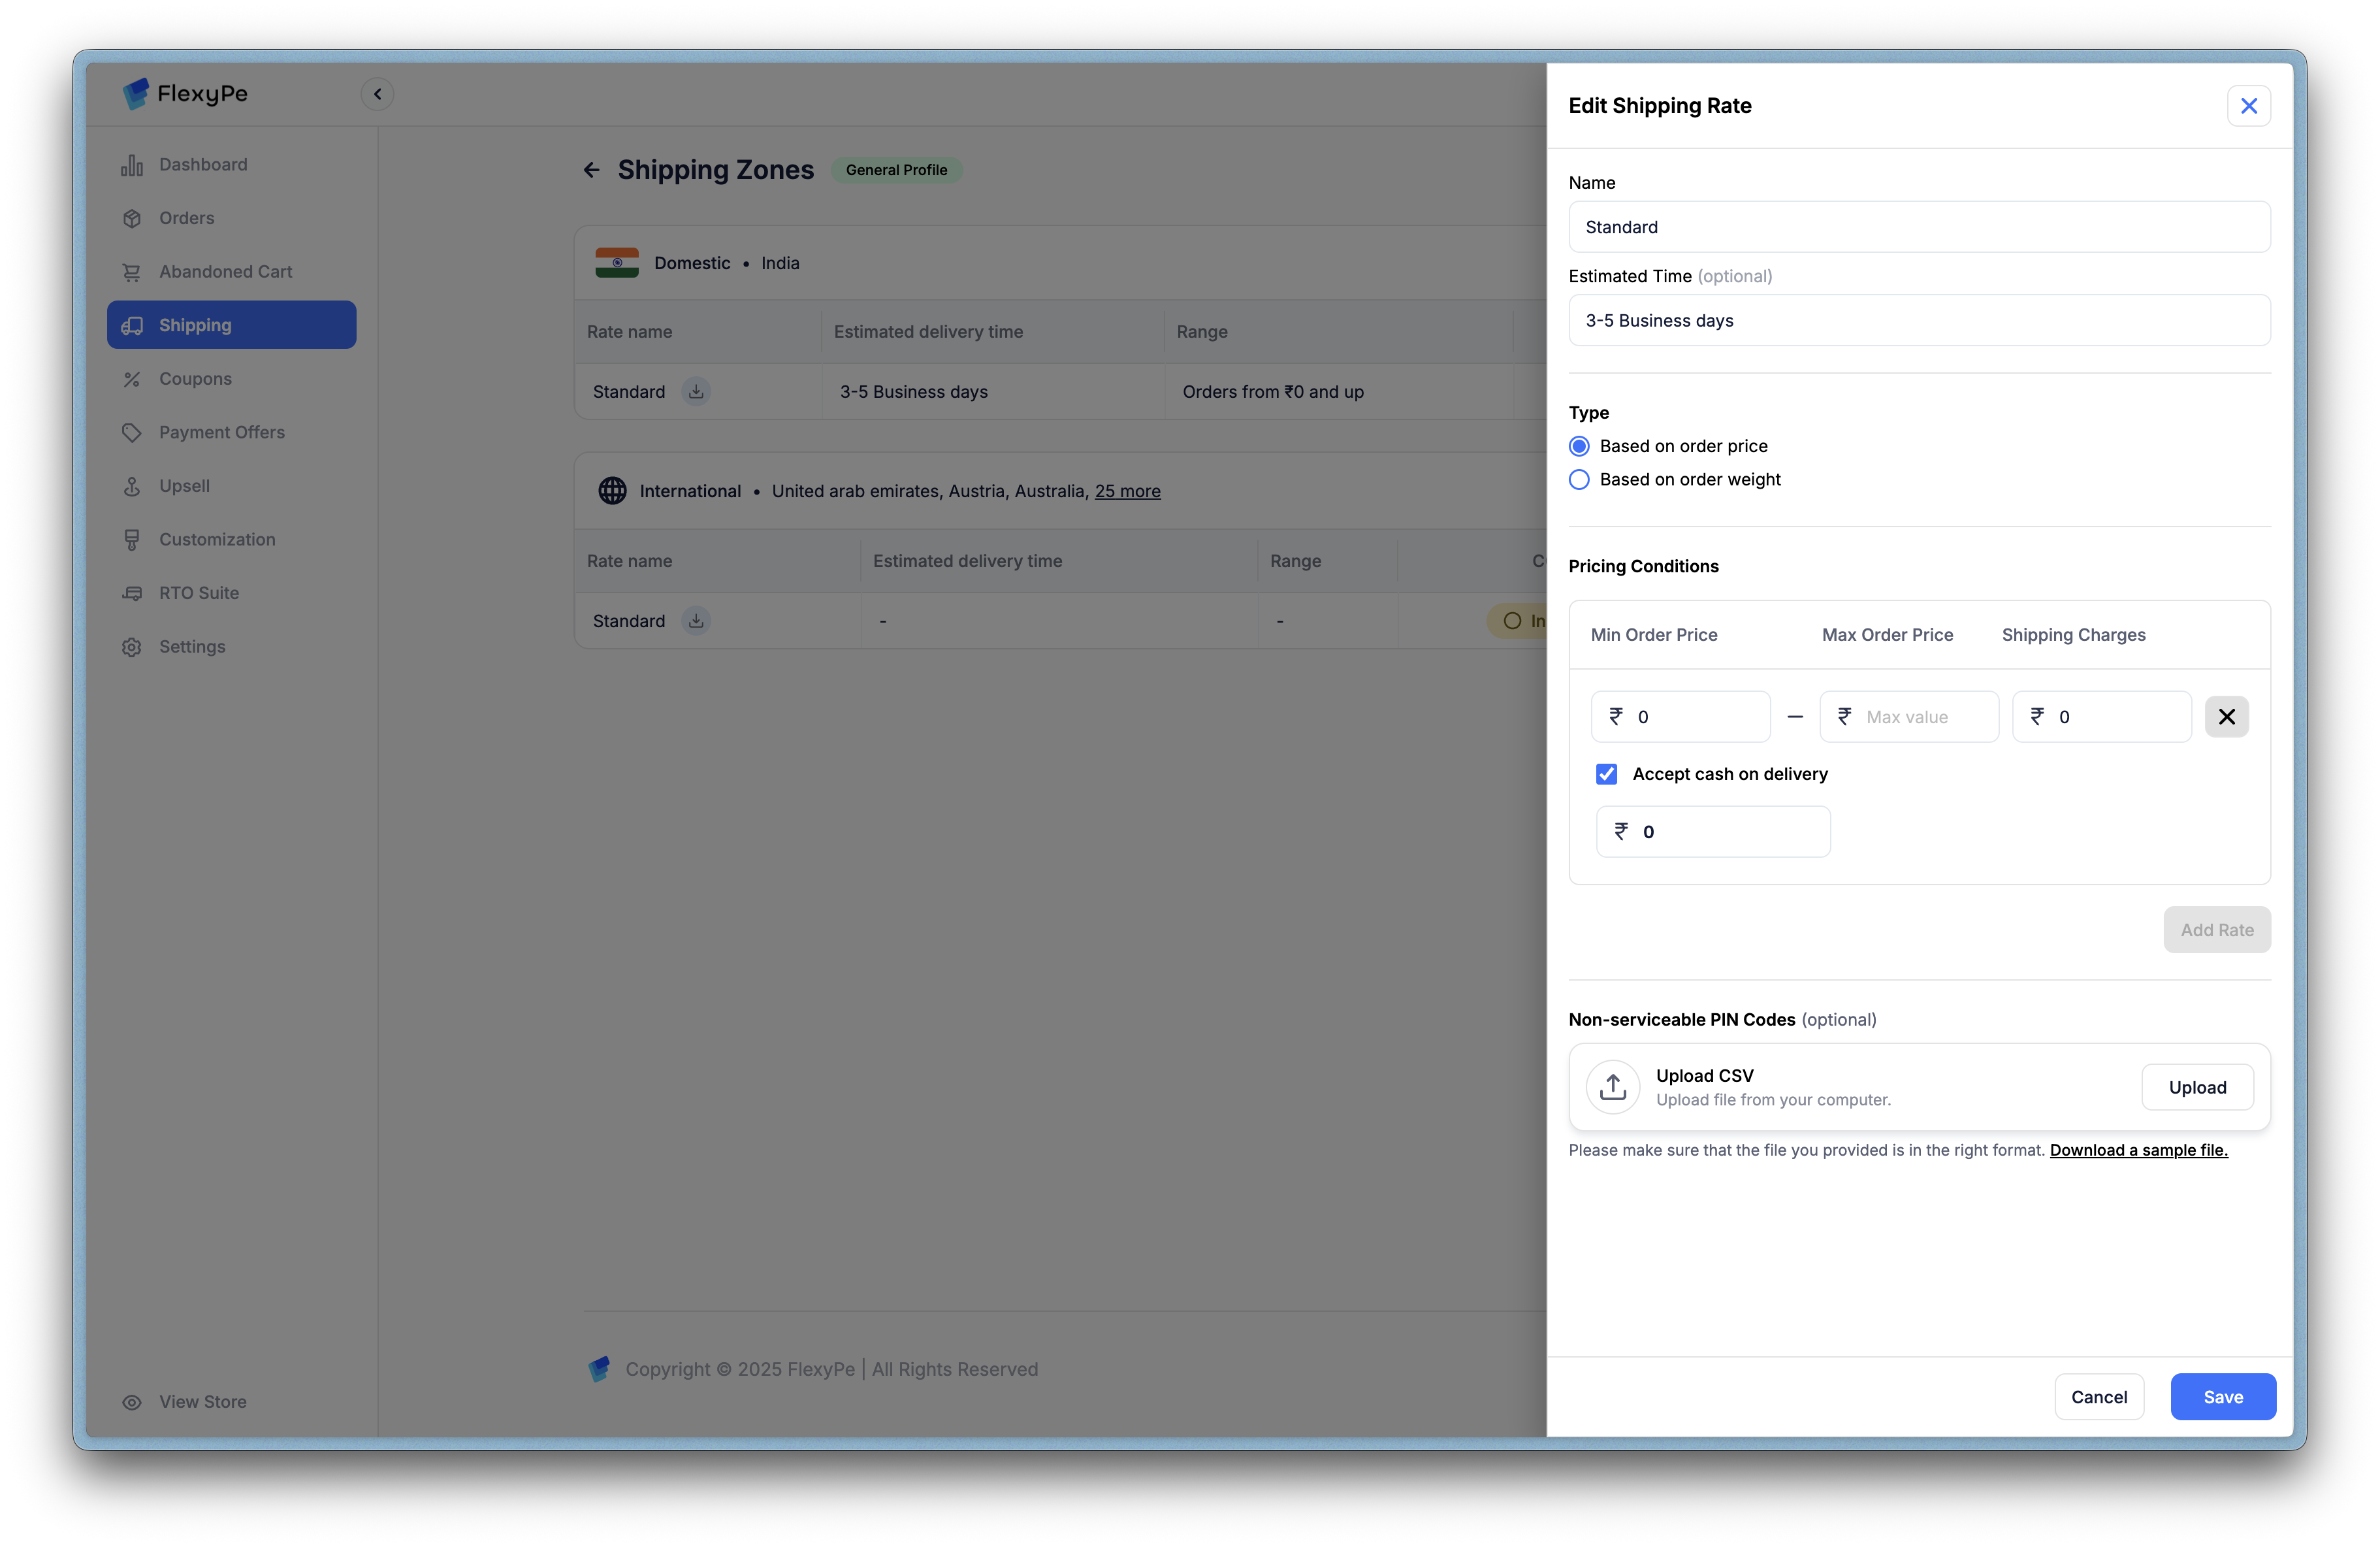
Step 4: Refine Delivery Rates
Edit rates via the pencil icon to tailor customer-facing details:- Rate Name & Timeline: E.g., “Standard Delivery in 2-5 days.”
- Pricing Type: Order value or weight-based, with min/max conditions.
- COD & Fees: Activate per zone, add charges to mitigate risks.
- Exclusions: Block non-serviceable PINs via CSV upload.
Strategic Benefits
These tools empower accurate, transparent shipping:- Seamless Syncing: Eliminate discrepancies between Shopify and FlexyPe.
- Risk Management: Restrict COD and exclude problematic areas to cut costs.
- Customer Clarity: Real-time estimates build trust and reduce support queries.